PENCIL PRACTICE · BEGINNER GUIDE
Open mouth drawing tutorial: lips, teeth and tongue in 6 steps
This open mouth drawing tutorial studies a neutral front view rather than a wide shout or a side angle. Begin with the shape of the opening, then wrap the lips around it. Treat the upper teeth as one curved band before suggesting divisions. The tongue belongs inside the cavity, so its edge should not cut through the lips. Keep a reference photo nearby if you want a more realistic expression.
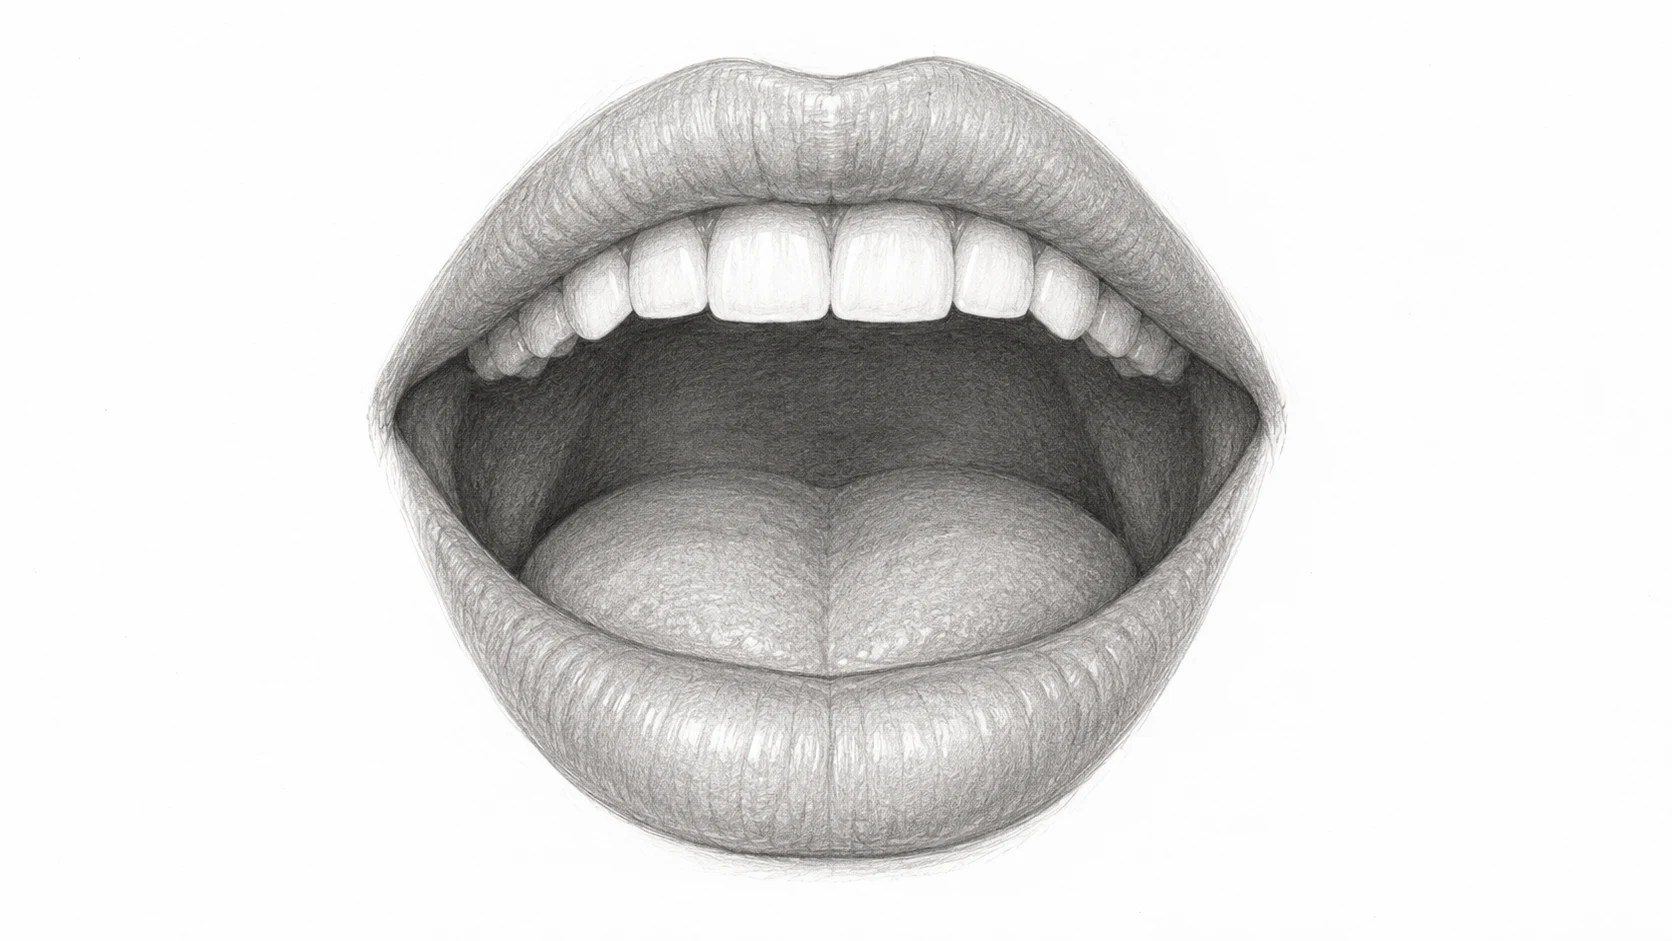
What you need and how to begin
Prepare paper, an HB pencil and a soft eraser. A slightly softer pencil can help darken the mouth cavity gradually. Draw the study larger than the mouth in a full portrait so you have space to compare corners and lip thickness.
Decide how far the jaw opens. In this exercise the opening is modest, with a visible upper tooth band and the tongue near the bottom. Do not combine a relaxed upper lip with an extreme lower-jaw opening unless your expression reference supports it.
Open mouth drawing tutorial — step by step
STEP 1 / 6
Set the width and centre
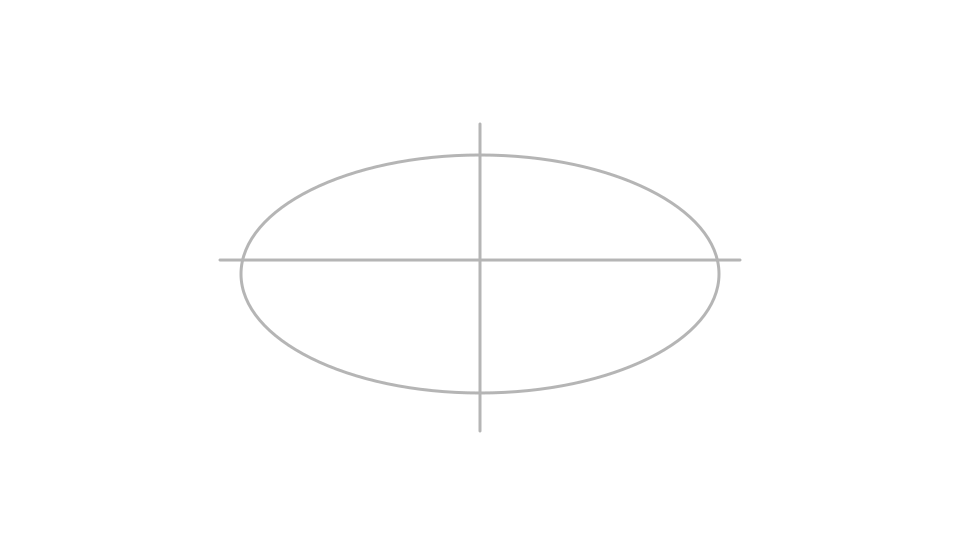
Black: earlier lines. Red: this step. Gray: temporary construction guides. Mark two mouth corners on a light horizontal guide. Add a short vertical centre mark between them. Sketch a soft oval around the opening area without committing to lip edges. Compare the width and intended height; a small change here alters the expression more than later tooth details.
Check your drawing: Keep both corners visible instead of burying them in thick outlines.
STEP 2 / 6
Shape the open cavity
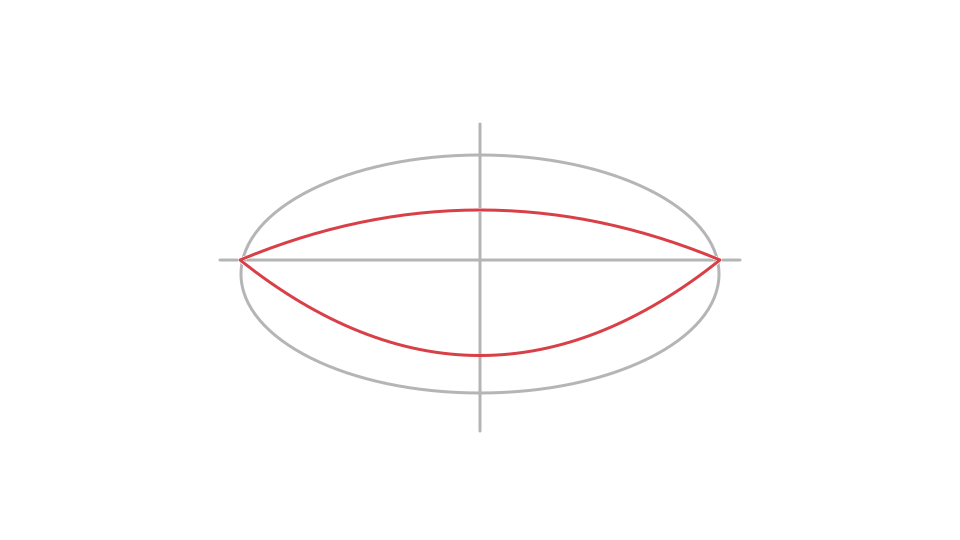
Black: earlier lines. Red: this step. Gray: temporary construction guides. Draw an upper opening edge and a lower curve joining the same corners. Keep the gap taller near the centre and let it taper toward the sides. Treat this as the inside opening, not the whole outer lip. Avoid a perfect mechanical oval if the expression has a gentle smile.
Check your drawing: The opening should close at both corners without an extra floating line.
STEP 3 / 6
Wrap the lips around the opening
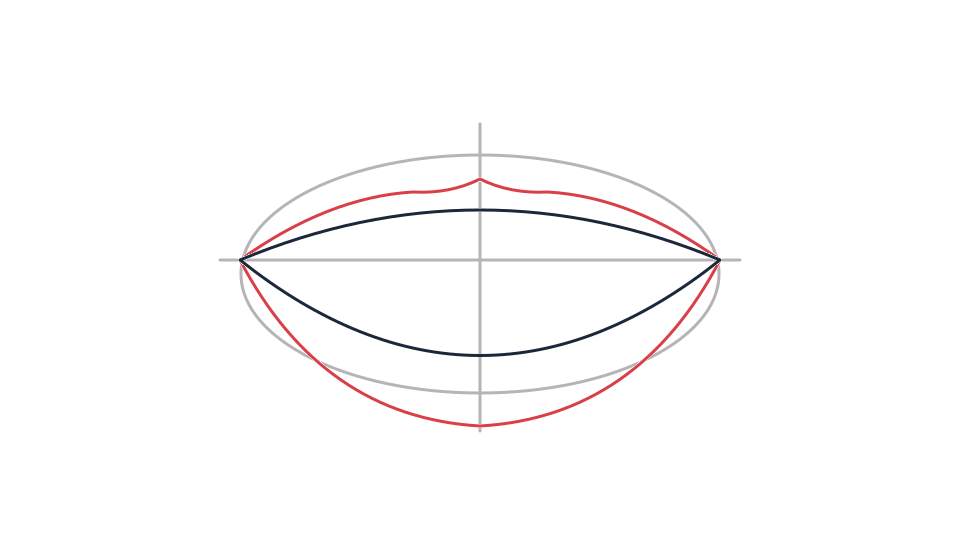
Black: earlier lines. Red: this step. Gray: temporary construction guides. Add a restrained upper-lip contour above the opening and a fuller lower-lip curve below. Suggest the upper centre dip without making a sharp letter shape. Thin the lips as they approach the corners. Leave part of the lower outer edge light so the form does not look cut out of paper.
Check your drawing: The lips should surround the opening rather than overlap the tooth area.
STEP 4 / 6
Place one curved tooth band
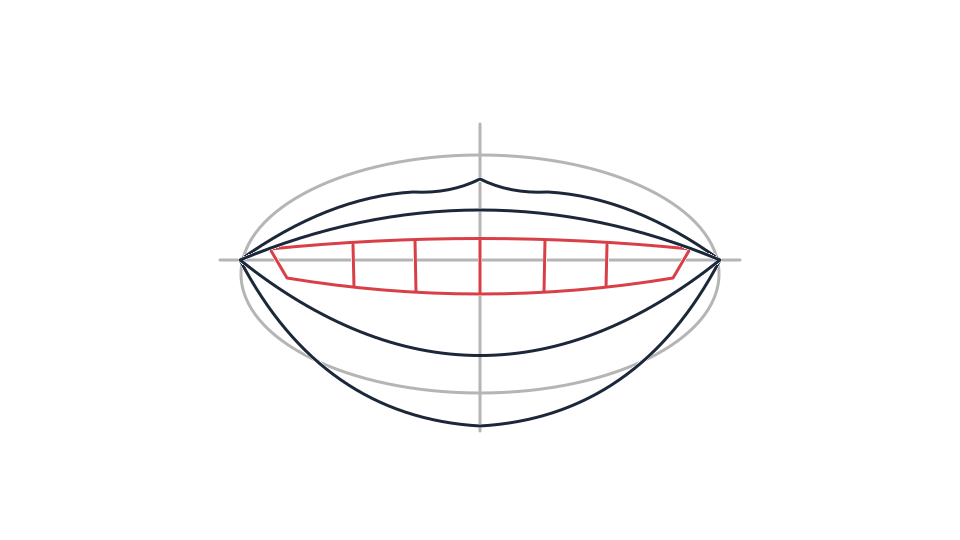
Black: earlier lines. Red: this step. Gray: temporary construction guides. Under the upper opening edge, draw a narrow curved band for the visible upper teeth. Keep its lower edge smooth at first. Add only a few very light separations if needed; avoid making each tooth a black-outlined rectangle. The teeth curve away at the sides rather than sitting in a flat row.
Check your drawing: Leave the teeth lighter than the space behind them.
STEP 5 / 6
Locate the tongue inside the cavity
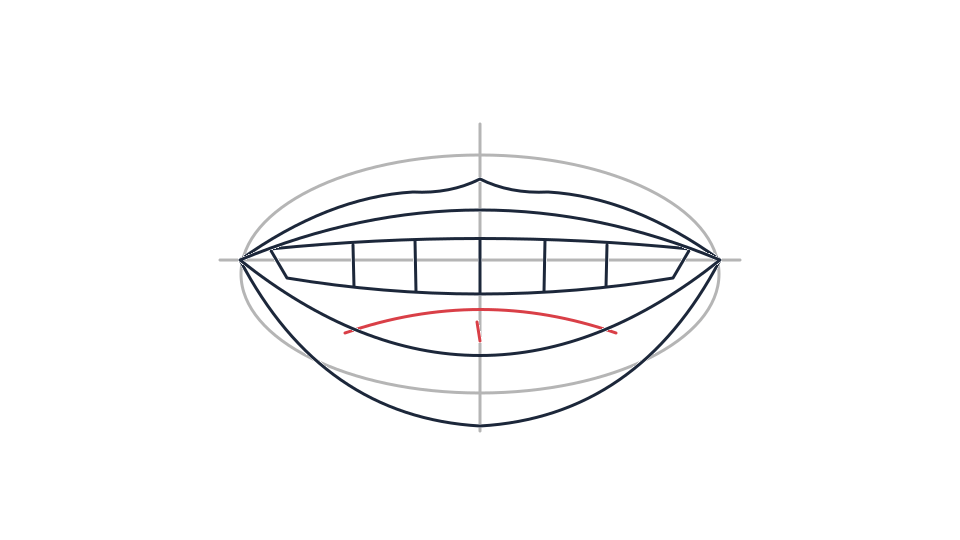
Black: earlier lines. Red: this step. Gray: temporary construction guides. Draw a broad soft curve near the lower part of the opening for the tongue. Let its sides disappear into the cavity. Keep a darker gap between tongue and upper tooth band where the reference shows one. A faint centre indication is optional; a deep dividing stripe will make the tongue look split.
Check your drawing: The tongue should remain behind the lower lip.
STEP 6 / 6
Build the darks gradually
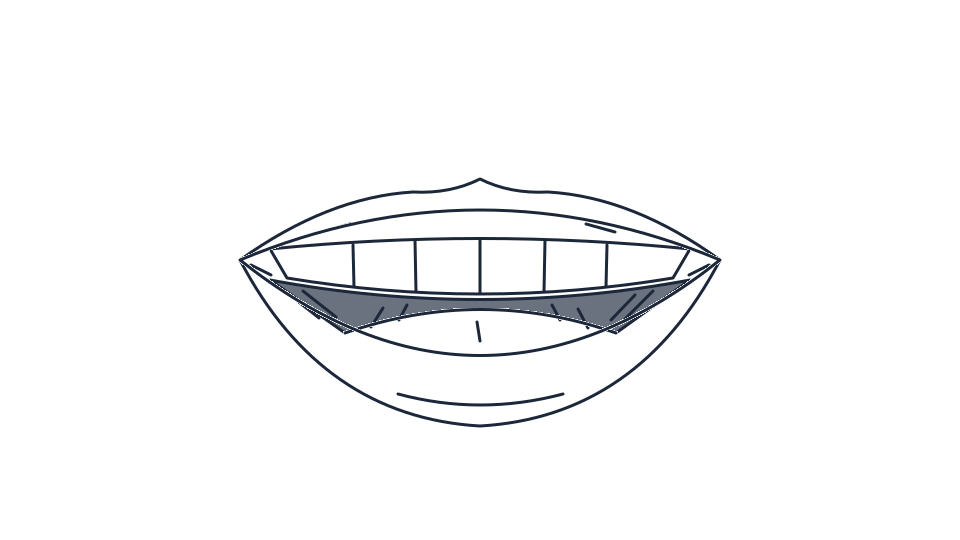
Finished practice line drawing; construction guides are removed. Shade the deepest cavity areas first, leaving the tooth band mostly white and the tongue a middle value. Add a little shadow under the upper lip and soften the lower lip with light strokes. Remove guides and extra tooth divisions. Keep the corners dark but small so they do not become black circles.
Check your drawing: From a distance, you should see lips, teeth and cavity as separate value groups.
Common problems and small corrections
Every tooth looks outlined
Lift the dark dividing lines and restore one pale tooth band. Suggest only the divisions needed by your reference and drawing scale.
The mouth looks pasted onto the face
Soften part of the outer lip edge. When adding the study to a face, check the surrounding chin and cheek forms instead of tracing an isolated oval.
Questions about this drawing exercise
Should all teeth be visible?
No. Visibility depends on the expression and viewing angle. This exercise uses a simplified upper band rather than a complete dental diagram.
Can I use this for an anime face?
Yes. Simplify the lip contours and tooth band further, keeping the opening, corners and tongue placement clear.
How can I draw a bigger shout?
Use an expression reference and reconsider jaw opening, lip tension and visible teeth together. Do not just stretch this small mouth vertically.
Try a second sketch
Repeat the open mouth drawing tutorial using a narrower opening and fewer tooth divisions. Compare the expressions before placing either version on a portrait or manga head. Keep the mouth consistent with the face angle.