PENCIL PRACTICE · BEGINNER GUIDE
Basic manga drawing tutorial: a front-view head for beginners
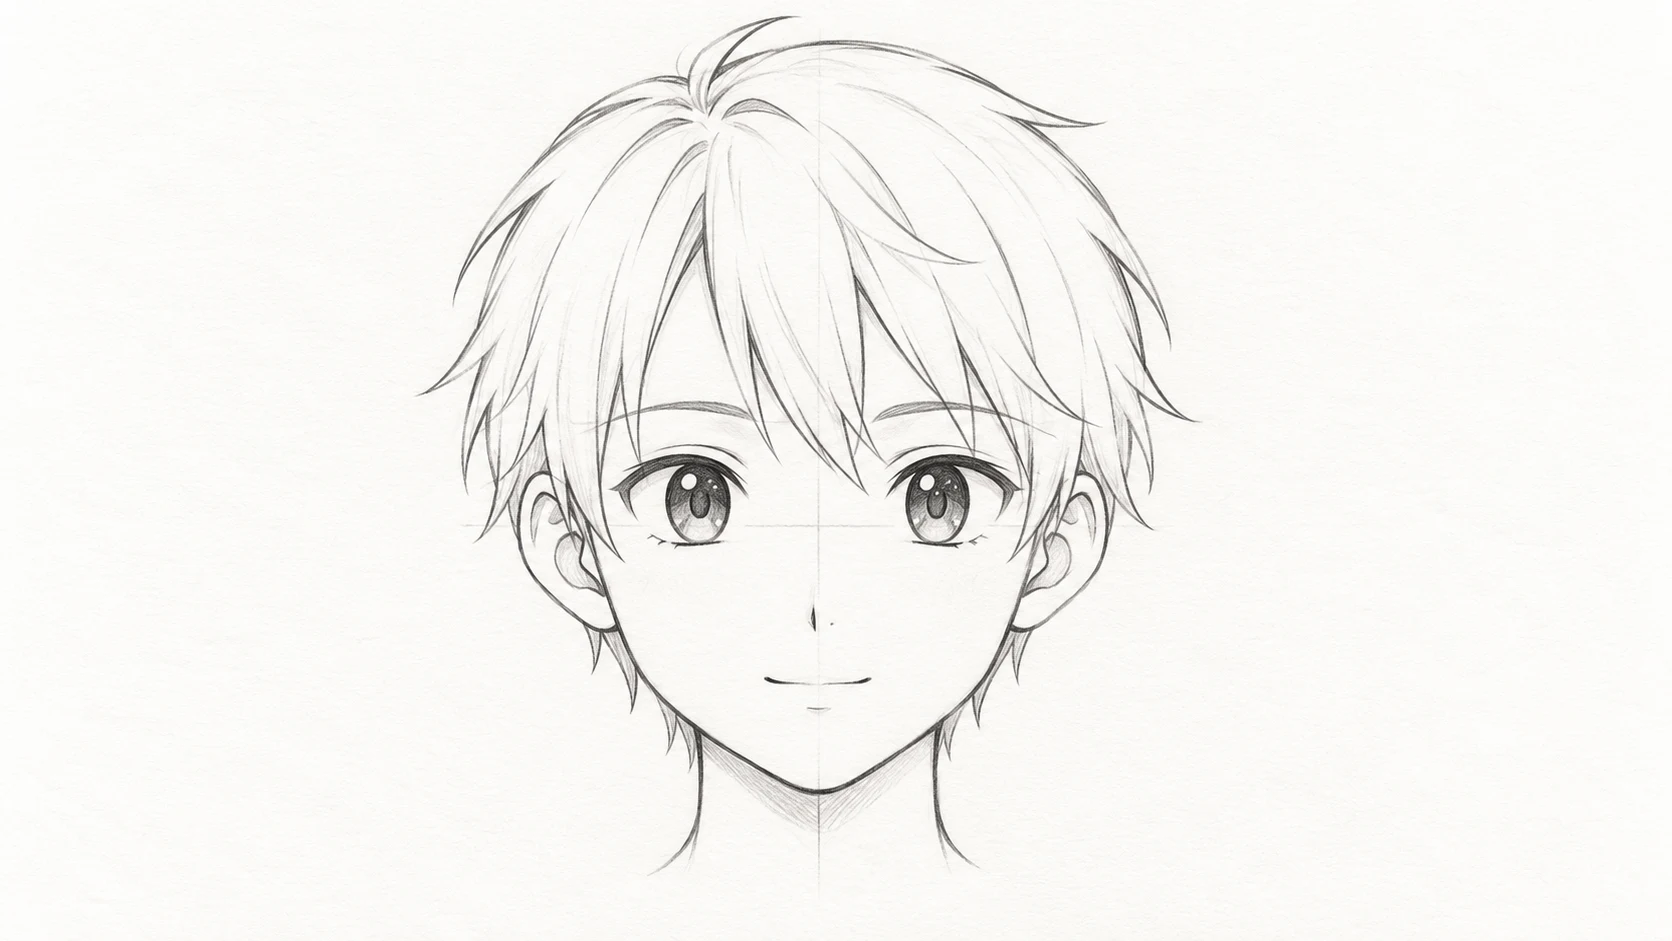
This basic manga drawing tutorial focuses on one front-view head. A light centreline and eye line help you compare the two sides before drawing hair and expression. The proportions here are one beginner-friendly example, not a standard for every manga character. Keep the pose neutral so you can study placement without also solving a turned head.
What you need and how to begin
Use paper, an HB pencil and eraser, or a digital brush with pressure sensitivity turned down while sketching. Reserve space above the skull for hair volume and below the chin for the neck. Work larger than a postage-stamp thumbnail so you can adjust the eyes.
Choose an original neutral face rather than copying a named character. Decide whether the jaw is rounded or slightly tapered. Keep that decision through both sides of the drawing; changing one cheek halfway through is a common source of accidental asymmetry.
Basic manga drawing tutorial — step by step
STEP 1 / 6
Block the skull and jaw
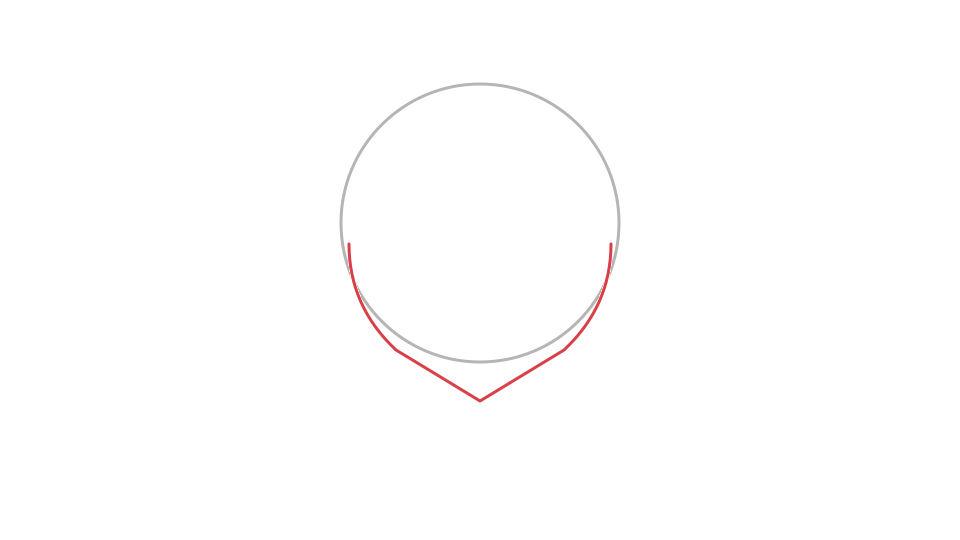
Black: earlier lines. Red: this step. Gray: temporary construction guides. Draw a round skull shape. Mark a chin below it and connect the sides with two gentle cheek-to-jaw curves. Keep the chin centred. The skull circle is a guide rather than the final face outline; the cheeks and jaw can change its lower silhouette.
Check your drawing: Compare the width on either side of the chin before adding features.
STEP 2 / 6
Place the centreline and eye line
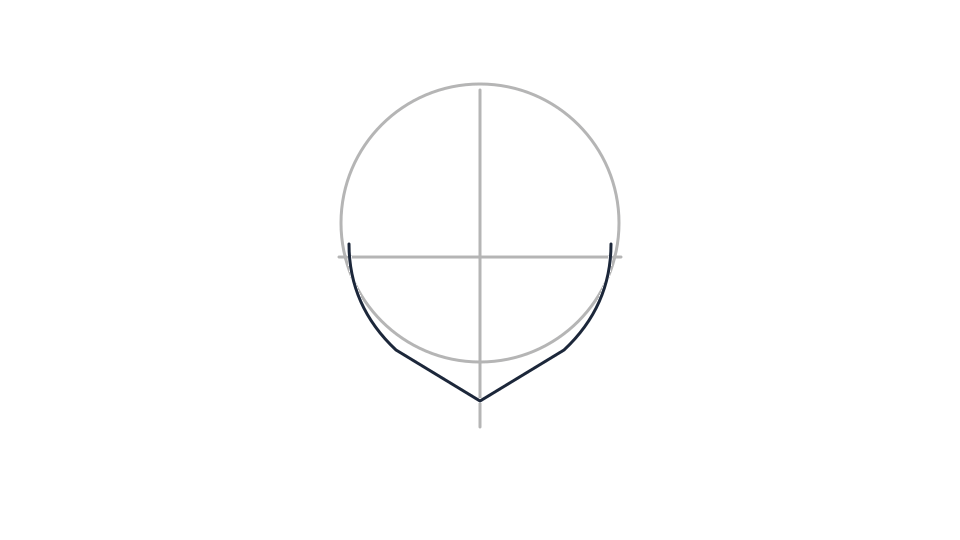
Black: earlier lines. Red: this step. Gray: temporary construction guides. Draw a faint vertical guide down the face and a horizontal eye guide. For this stylised example, place the eye guide a little below the skull centre. Treat it as a shared level for the two eyes, not as a permanent stripe. Leave enough room below for the small nose and mouth.
Check your drawing: The eye guide should cross the centreline levelly.
STEP 3 / 6
Build both eye shapes together
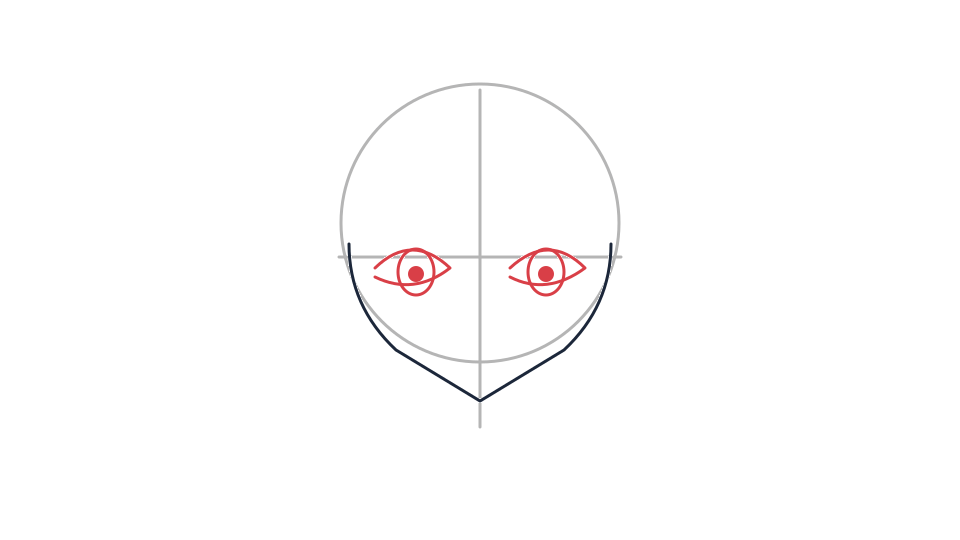
Black: earlier lines. Red: this step. Gray: temporary construction guides. Mark the inner and outer corners on both sides before drawing either iris. Use simple curved upper lids and lighter lower lids. Compare eye widths and the gap between them. Place both irises looking in the same direction; keep highlights in similar positions if you add them.
Check your drawing: Cover the hair area and check that the two eyes belong to the same face.
STEP 4 / 6
Add small features, ears and neck
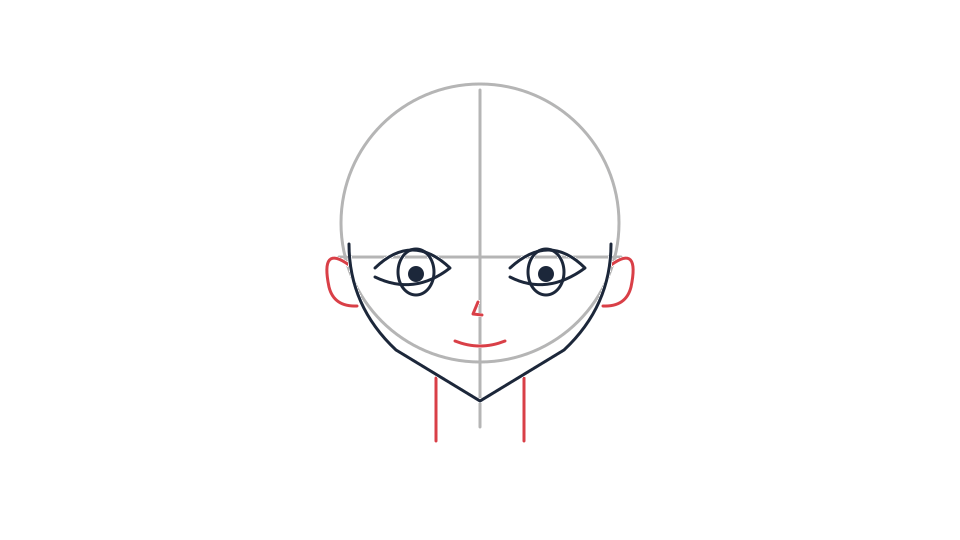
Black: earlier lines. Red: this step. Gray: temporary construction guides. Use a short mark for the nose on the centreline and a small mouth beneath it. Place ears at similar heights on the sides of the head. Add two neck lines below the jaw, narrower than the head. Keep the expression quiet while you test the spacing.
Check your drawing: Do not let the mouth drift to one side of the centre guide.
STEP 5 / 6
Build hair outside the skull
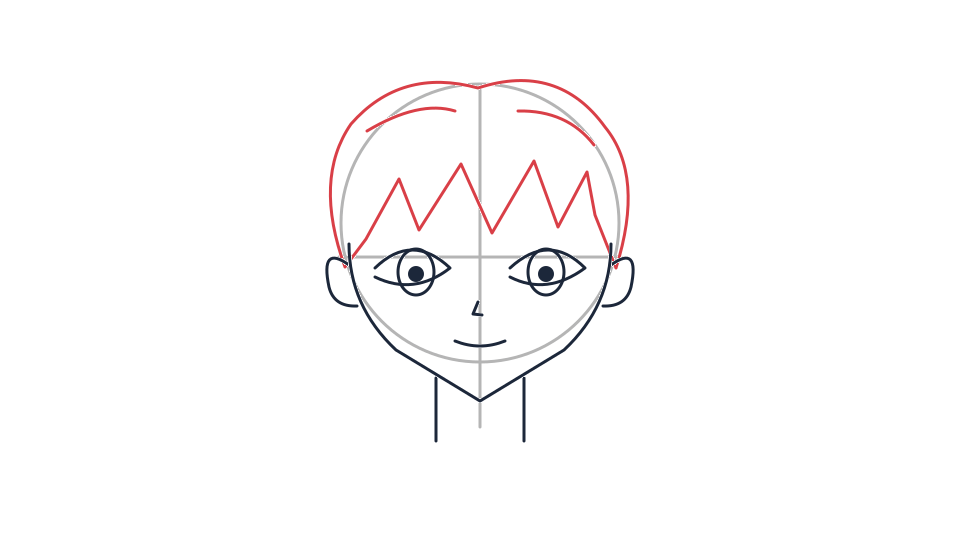
Black: earlier lines. Red: this step. Gray: temporary construction guides. Sketch a hair cap outside the skull circle, leaving a small gap for volume. Group the fringe into broad locks and choose a few larger side shapes. Let some hair overlap the forehead, erasing the hidden skull edge. Do not attach each strand separately to the face outline.
Check your drawing: The hair should have room above the skull rather than flattening the head.
STEP 6 / 6
Clean the face and choose a few accents
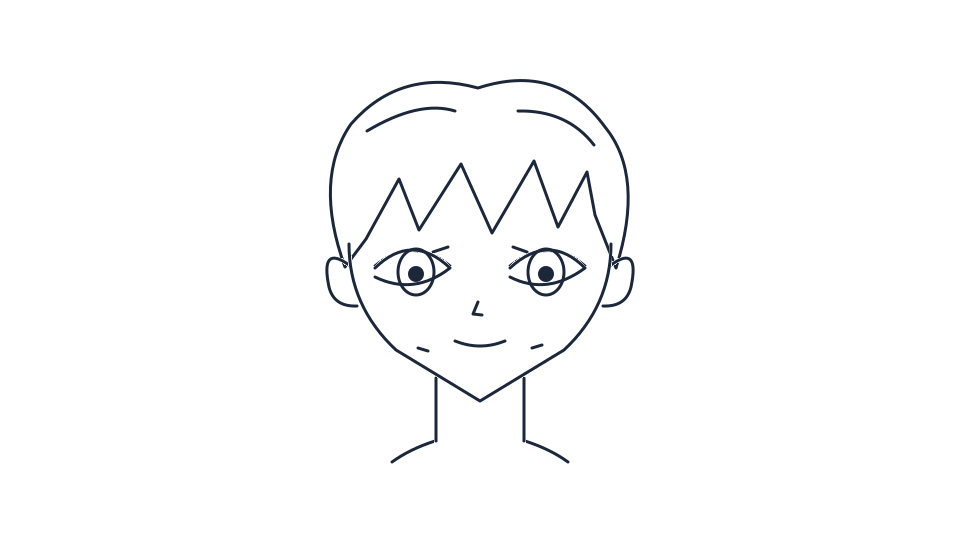
Finished practice line drawing; construction guides are removed. Erase the construction guides after checking eye alignment. Darken selected upper-lid and hair-overlap lines. Keep nose and lower-lid marks light. Leave broad cheek areas empty so the face stays readable. Save blush, accessories and complex shading for a second version after the neutral head works.
Check your drawing: At a small size, the eye direction and jaw should still be clear.
Common problems and small corrections
One eye is higher
Redraw the shared guide lightly and compare the four eye corners. Moving an eyelid is easier before the iris is filled dark.
The hair looks pasted on
Move the hair outline slightly outside the skull and group strands into locks. Keep some overlap at the forehead instead of outlining the skull underneath.
Questions about this drawing exercise
Is there one correct manga head ratio?
No. Ratios vary by artist and character. Use this front-view exercise as a starting point and change one proportion at a time.
Should I draw the eyes first?
You can, but beginners may find it easier to establish the head and shared guides before committing to detailed eyes.
How do I practise a turned face?
After the front view feels clear, turn the centreline around the skull and compare the visible widths. Do not simply slide both eyes sideways.
Try a second sketch
Repeat the basic manga drawing tutorial with slightly smaller eyes and a rounder jaw. Keep the same guides and compare how the character changes. Practise a turned head separately so you can tell style changes from perspective changes.