PENCIL PRACTICE · BEGINNER GUIDE
Everglades snail kite drawing tutorial: a perched bird in 6 steps
This Everglades snail kite drawing tutorial studies a perched bird in side view. Begin with the body, head and tail direction, then add the bill and folded wing. The reference represents a simplified adult male. For identification, the slender curved bill, grey male plumage and pale patch at the tail base are useful features to compare with the linked wildlife sources.
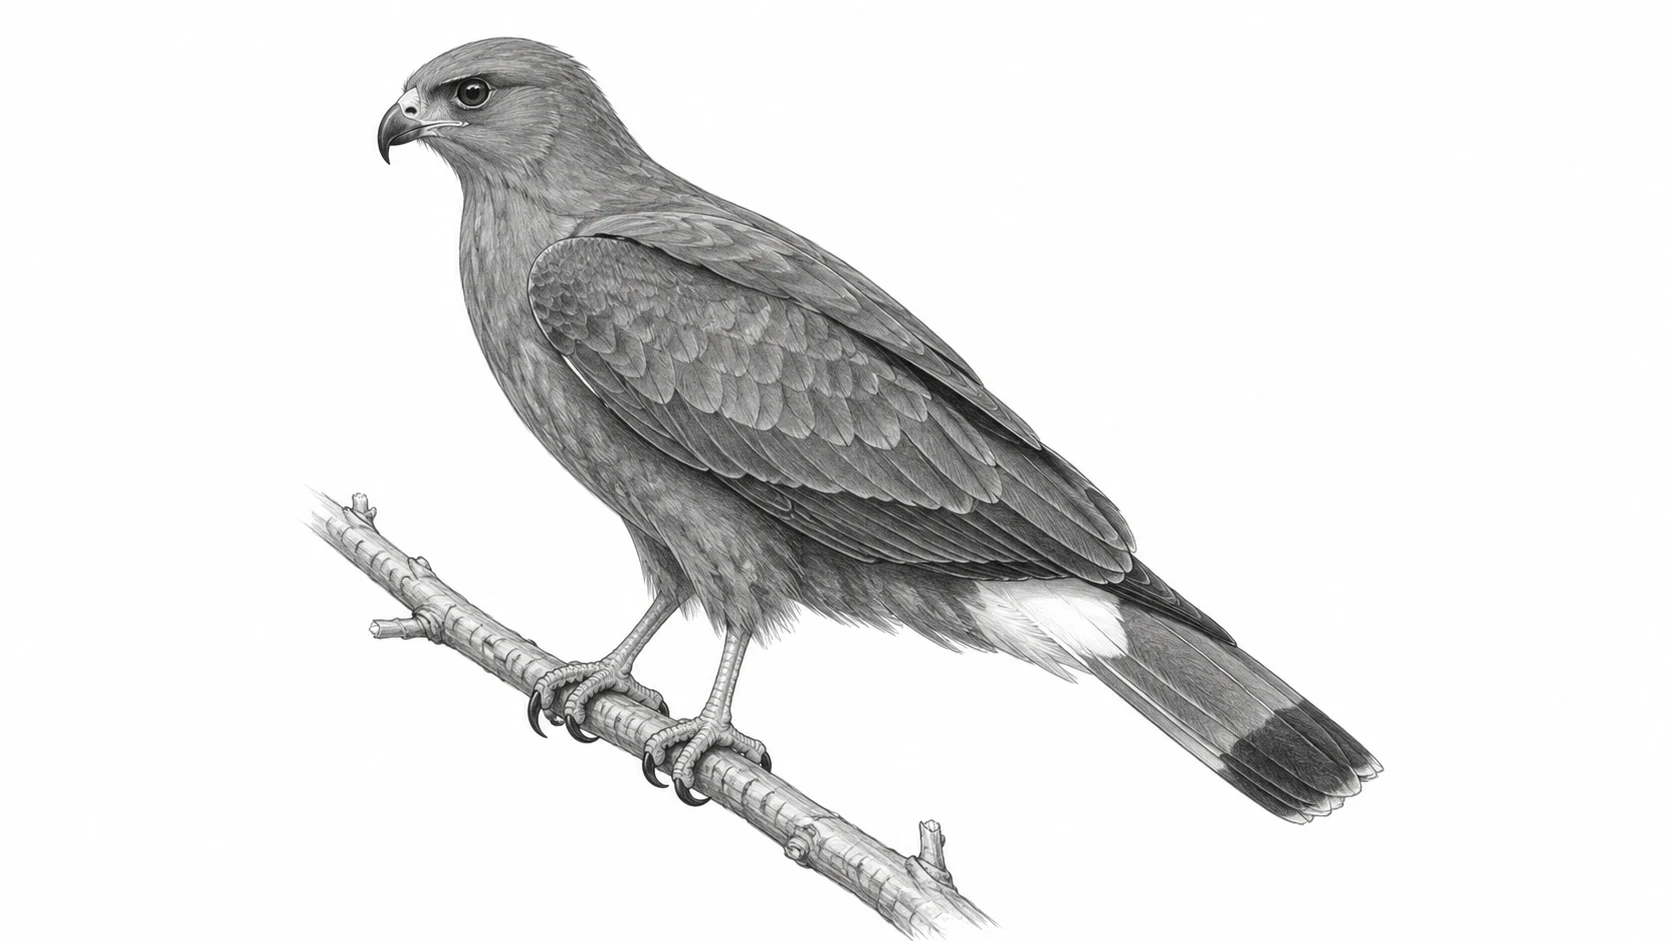
What you need and how to begin
Use an HB pencil and eraser, with a softer pencil optional for the wing. Keep a clear wildlife photograph nearby to check anatomy. The AI reference is an illustration, not an identification photograph; use the official sources for details that matter to species recognition.
Choose a perched pose rather than flight for the first study. Leave room below the body for the long tail and branch. Keep the branch simple so you can concentrate on the relationship between the small head, body mass and folded wing.
Everglades snail kite drawing tutorial — step by step
STEP 1 / 6
Block the body and head
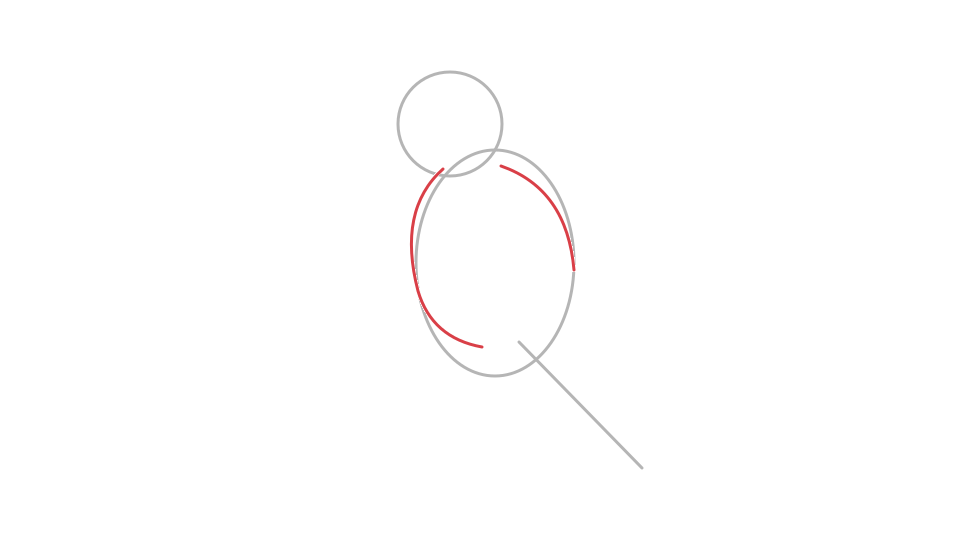
Black: earlier lines. Red: this step. Gray: temporary construction guides. Sketch a tilted oval for the body and a smaller rounded shape above it for the head. Connect them with a short neck transition. Mark a light direction line along the tail before adding feathers. Keep the bird small enough on the page that the entire tail will fit.
Check your drawing: The head should be smaller than the main body mass.
STEP 2 / 6
Draw the slender hooked bill
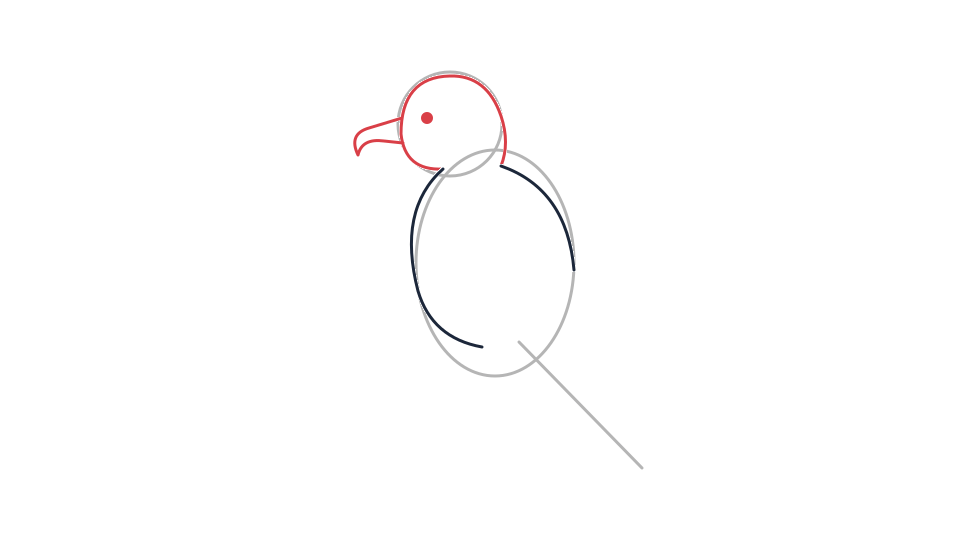
Black: earlier lines. Red: this step. Gray: temporary construction guides. Project a short bill from the front of the head, narrowing it before curving the tip downward. Keep the hook fine instead of adding a huge eagle-like beak. Place a small eye behind the bill base. Compare its position with a wildlife reference before darkening either feature.
Check your drawing: The bill hook should be distinct even without heavy shading.
STEP 3 / 6
Place the folded wing
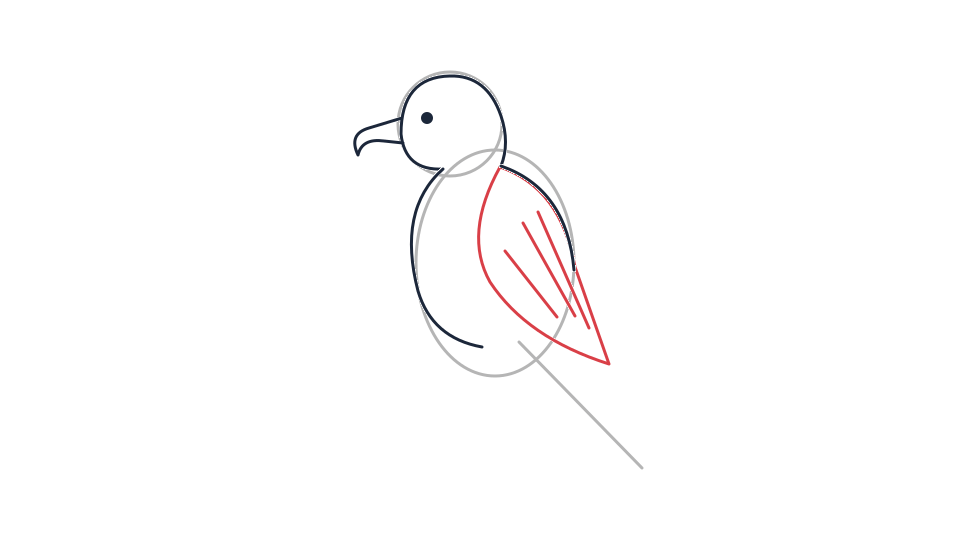
Black: earlier lines. Red: this step. Gray: temporary construction guides. From the shoulder area, draw a broad folded-wing shape tapering back toward the tail. Let it overlap the body side while keeping the breast curve visible. Group the long flight feathers near the wing tip instead of covering the entire wing with repeated scallops.
Check your drawing: The wing should attach near the shoulder rather than low on the belly.
STEP 4 / 6
Extend the tail and reserve its pale base
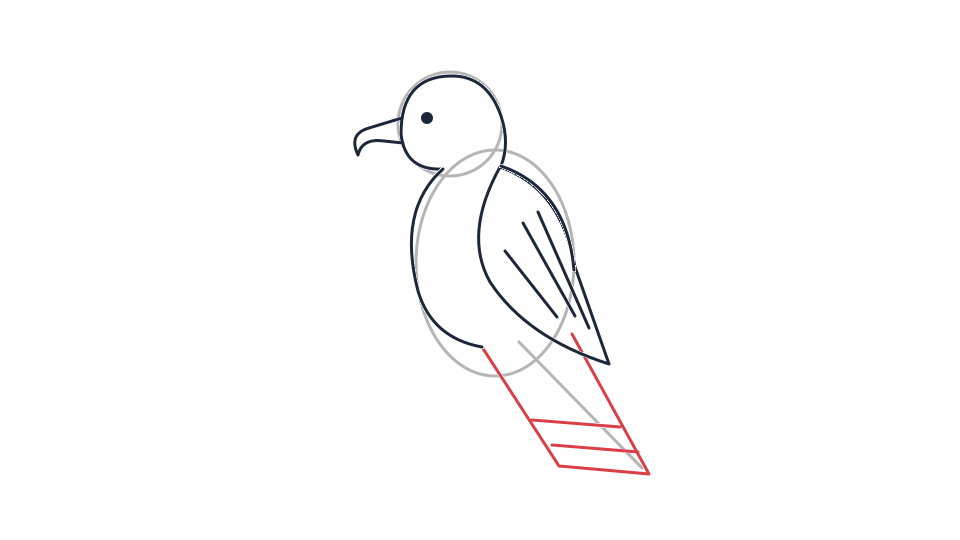
Black: earlier lines. Red: this step. Gray: temporary construction guides. Build a long tail below the folded wing with a few parallel feather groups. Keep the end restrained rather than drawing a dramatic fork. Reserve a pale area at the tail base for the white patch noted in identification sources. Avoid filling the whole tail solid before checking the pattern.
Check your drawing: Keep the tail separate from the wing tip where the two contours meet.
STEP 5 / 6
Add feet gripping a branch
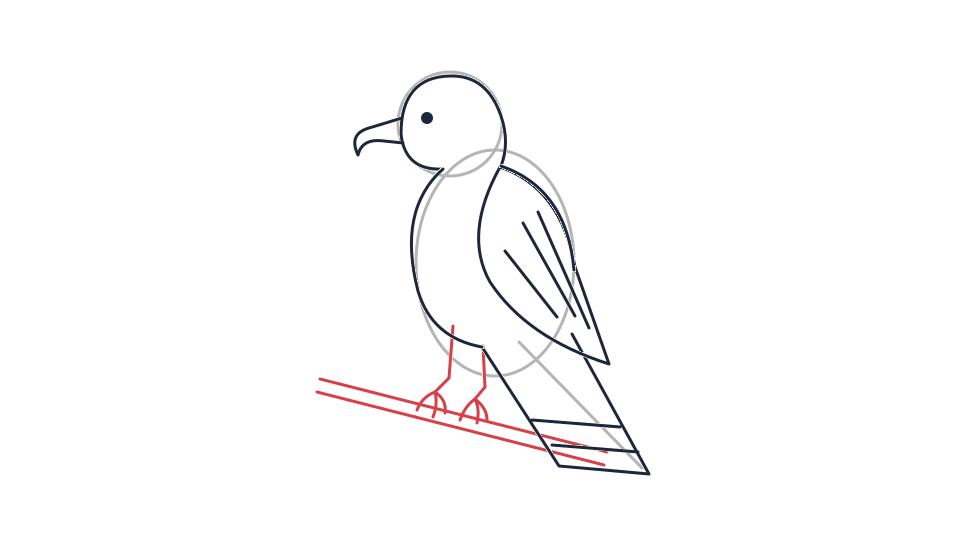
Black: earlier lines. Red: this step. Gray: temporary construction guides. Place two slim leg indications beneath the body and add feet curling around a narrow branch. Let some toes disappear behind it. Keep the branch under the bird’s weight rather than beside both feet. Erase the branch line where visible toes pass in front.
Check your drawing: At least one clear contact should explain how the bird is perched.
STEP 6 / 6
Group feathers and values
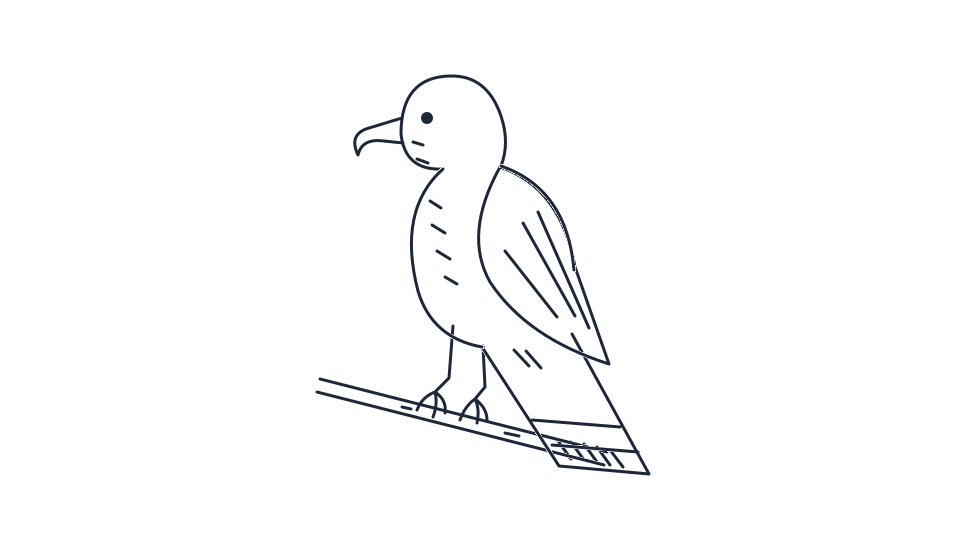
Finished practice line drawing; construction guides are removed. Use a light grey body value with darker wing and tail accents for this adult-male study. Preserve the pale tail-base patch and a little paper around the eye. Add only enough feather edges to explain the form. Remove construction ovals and compare the silhouette with the photographic source.
Check your drawing: Do not let repeated feather marks hide the bill shape or pale tail patch.
Common problems and small corrections
The beak looks too heavy
Compare the slender downward curve with the official photographs. Reduce the bill mass before adding a darker outline.
The wing and tail become one shape
Lift a little graphite at their overlap and simplify feather groups. Distinguishing those two forms matters more than adding every feather.
Questions about this drawing exercise
Is a snail kite a snail?
No. It is a bird of prey. Its specialised curved bill helps it feed on snails; the linked National Park Service profile explains that relationship.
Are females grey too?
The grey adult male is the subject here. Female and immature plumages differ, so use a reference for the particular bird you want to draw.
Do I need to draw every feather?
No. Start with the folded-wing mass, long tail and a few feather groups. Add detail only after the overall proportions work.
Try a second sketch
Repeat the Everglades snail kite drawing tutorial as a small silhouette study. Keep the fine bill hook, folded wing and long tail recognisable. Compare a wildlife photograph before attempting a flying pose with spread wings.
Species references
Check identification details against these wildlife sources. The drawing above is an illustration.