PENCIL PRACTICE · BEGINNER GUIDE
Easy horse head pencil drawing tutorial: simple side-profile line art
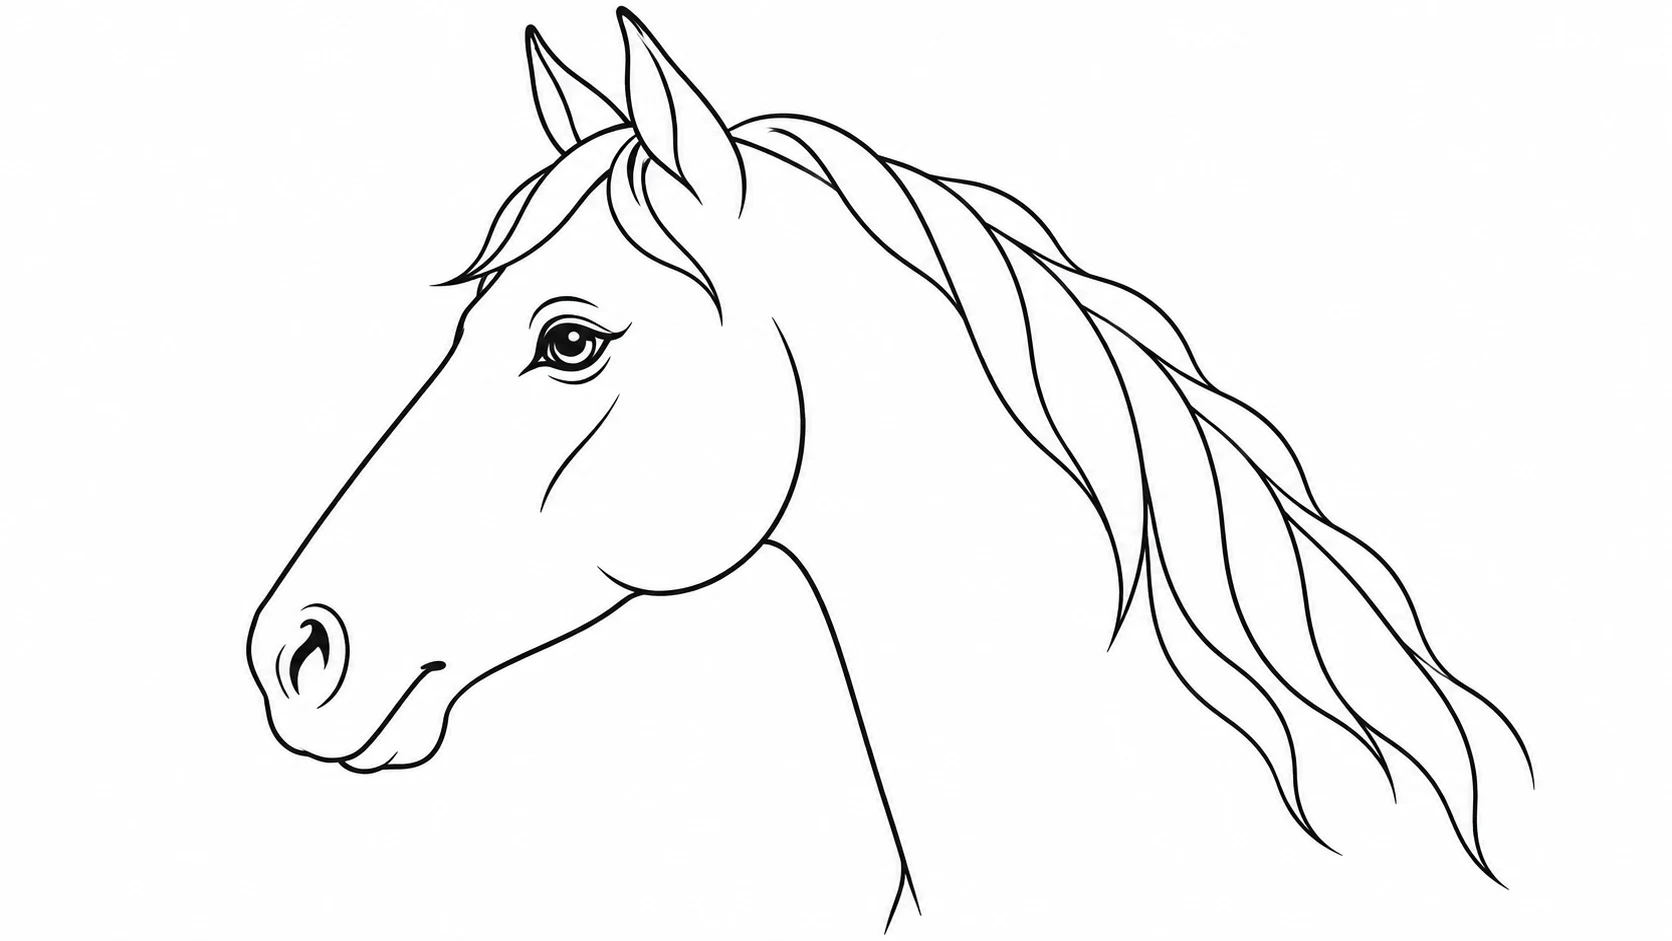
For an easy horse head pencil drawing tutorial, begin with two connected shapes instead of outlining every feature at once. A larger oval establishes the skull and a smaller one places the muzzle. This lesson develops them into side-profile line art, with one visible eye, a simple nostril and grouped mane shapes. Keep shading optional so the silhouette does most of the work.
What you need and how to begin
Use an HB pencil, plain paper and an eraser. Choose a side-view horse photograph if checking anatomy; avoid a strongly foreshortened view for the first attempt. Leave space behind the skull for the neck and mane, and in front of the muzzle for the direction the horse faces.
Turn the page horizontally and choose the facing direction before sketching. The reference gives you a finished shape to observe. It is not necessary to copy its hair strands or shadows: simplify both while you learn the relationship between the skull and muzzle.
Easy horse head pencil drawing tutorial — step by step
STEP 1 / 6
Place the skull and muzzle
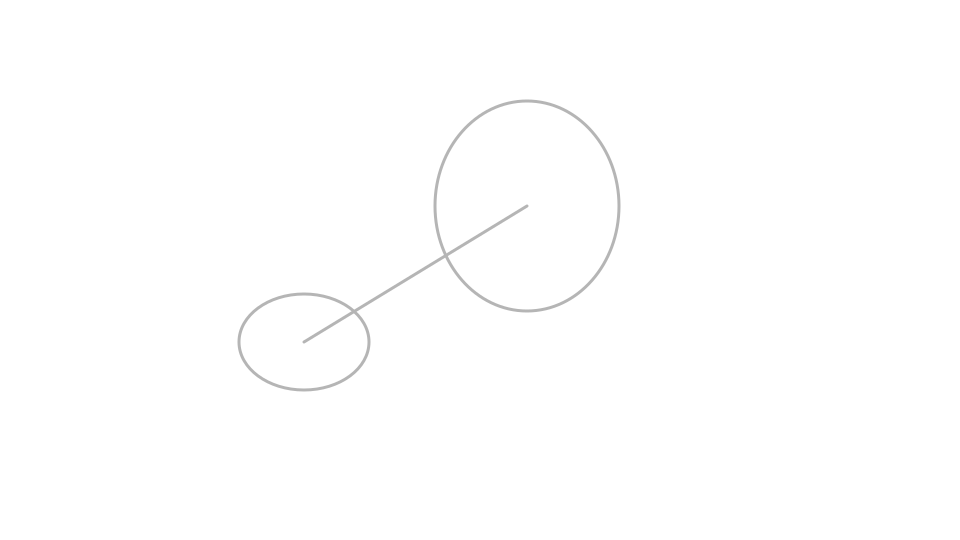
Black: earlier lines. Red: this step. Gray: temporary construction guides. Draw a tilted oval for the upper head. Place a smaller oval lower and in front for the muzzle, leaving a clear distance between their centres. Lightly connect the centres to establish the direction of the face. Keep both shapes loose enough to adjust before joining their edges.
Check your drawing: If the muzzle sits too close to the skull, the head may look like a dog.
STEP 2 / 6
Join the forehead, nose and jaw
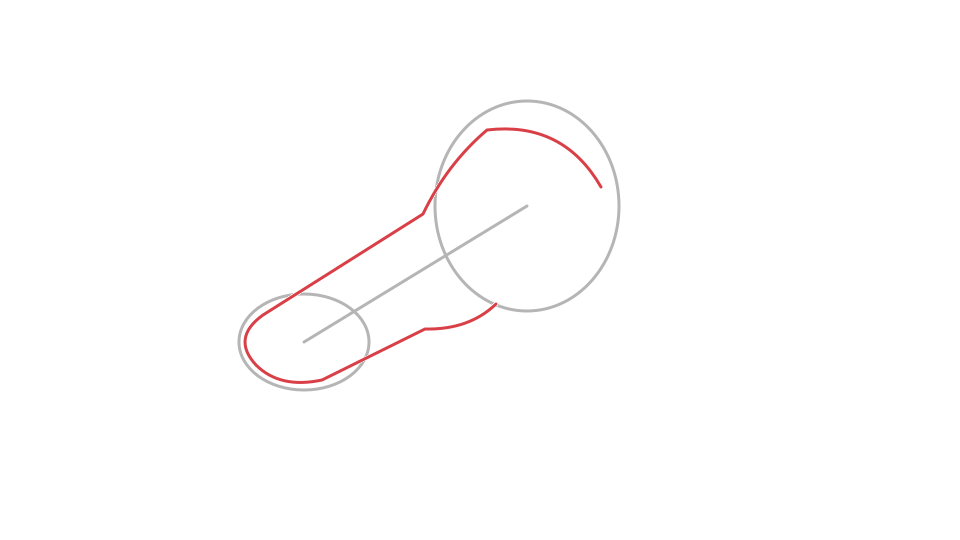
Black: earlier lines. Red: this step. Gray: temporary construction guides. Connect the upper edges with a long forehead-to-nose line, allowing a gentle change of angle rather than a sharp step. Connect the lower muzzle to the cheek with a separate jaw contour. Keep the cheek fuller than the narrow bridge. Erase the hidden portions of the construction ovals.
Check your drawing: The face should read as a long form before you add the eye.
STEP 3 / 6
Add the ears and neck
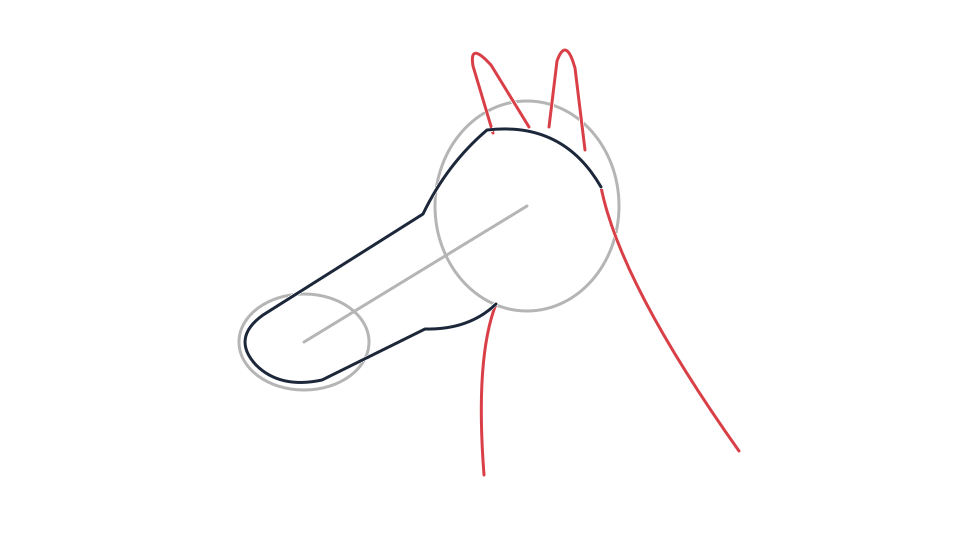
Black: earlier lines. Red: this step. Gray: temporary construction guides. Place two tapered ears near the top of the skull, with the farther one partly hidden. Bring the back of the head down into an arched neck. From beneath the jaw, draw a second neck line. Leave enough width between those lines to support the head rather than attaching it to a thin tube.
Check your drawing: Ears should grow from the skull, not from the middle of the mane.
STEP 4 / 6
Locate the visible eye and nostril
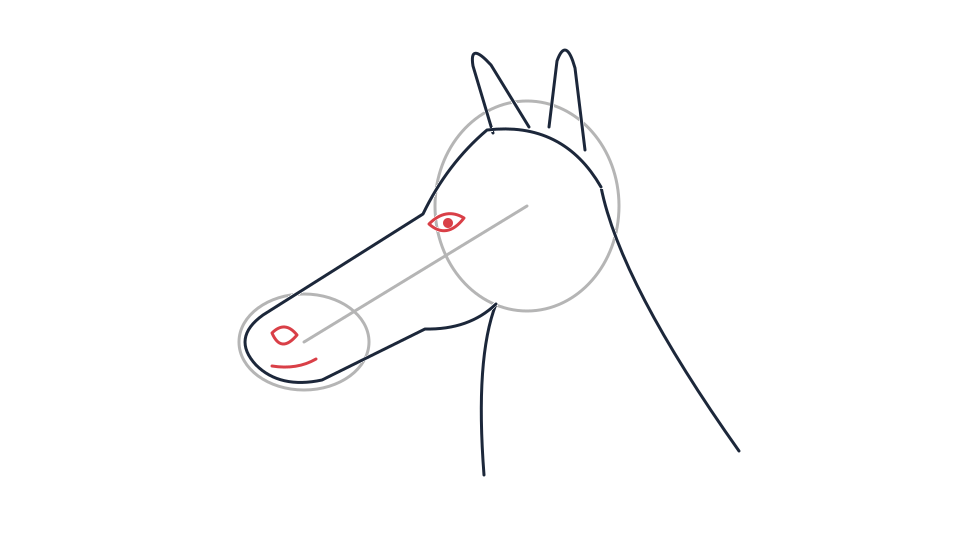
Black: earlier lines. Red: this step. Gray: temporary construction guides. Place a small eye high on the side of the head, below and in front of the ear base. Draw a curved upper lid and a restrained dark pupil. Put one nostril near the front of the muzzle and a short mouth line below it. Keep these marks smaller than you first expect.
Check your drawing: In a clean side profile, you do not need a second full eye.
STEP 5 / 6
Group the mane into locks
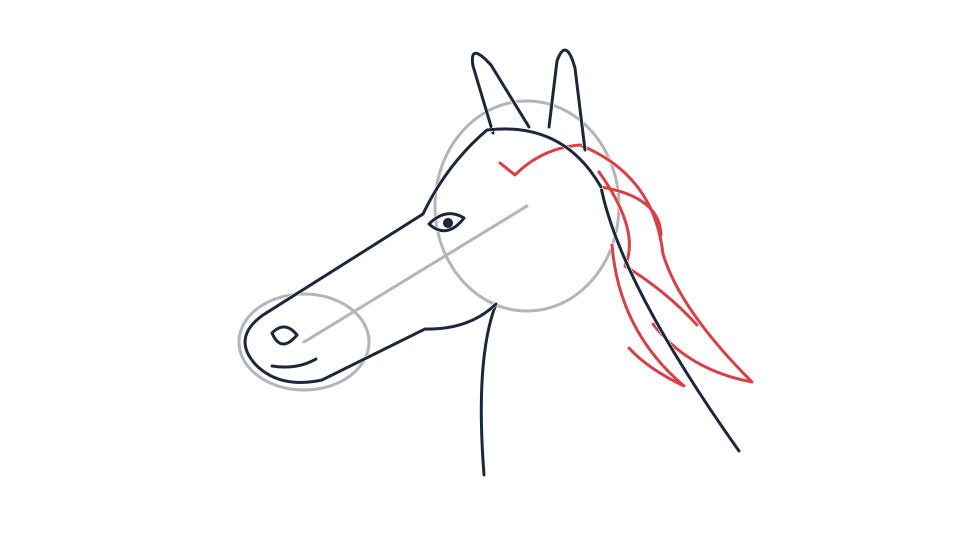
Black: earlier lines. Red: this step. Gray: temporary construction guides. Sketch the mane along the back of the neck as several broad tapered locks. Let a short forelock fall between the ears. Draw the outside rhythm first and use only a few internal strands. Keep the mane attached to the neck contour instead of making separate floating spikes.
Check your drawing: The neck silhouette should remain readable through the hair shapes.
STEP 6 / 6
Finish a clean line-art version
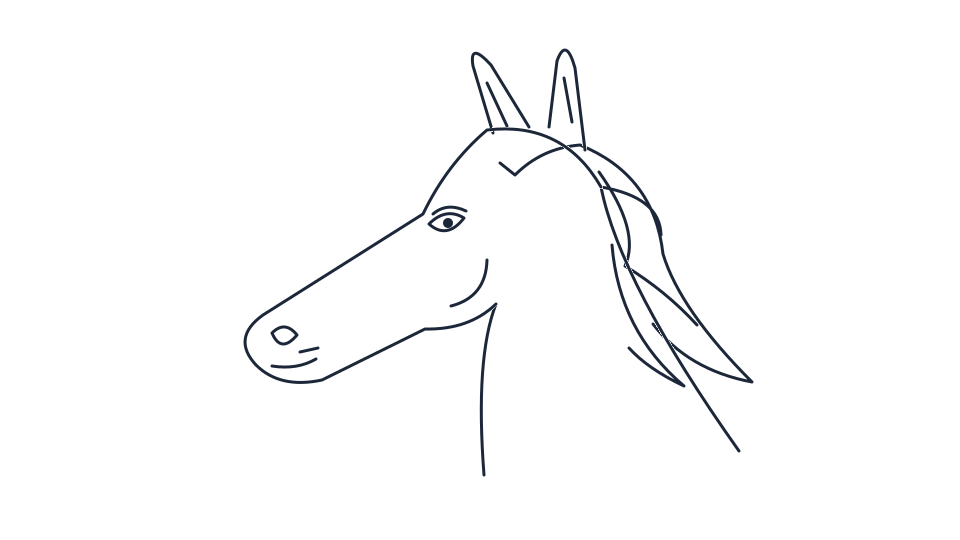
Finished practice line drawing; construction guides are removed. Remove the remaining construction lines. Reinforce the eyelid, nostril and a few overlaps, keeping the rest of the outline lighter. Omit broad shading if you want simple horse head line art. Compare the ear size and muzzle length one last time before adding decorative details.
Check your drawing: Check the head at a small viewing size; the horse should still be recognisable.
Common problems and small corrections
The horse looks like a dog
Move the muzzle farther from the skull and compare the forehead length with a side-view reference. Do not try to fix the shape by making the ears huge.
The eye looks human
Reduce its size and simplify the eyelid. Avoid adding a large white oval or placing the eye at the front of the face.
Questions about this drawing exercise
Can I finish without shading?
Yes. Clear muzzle, ear and neck shapes are enough for a simple line drawing. Use a few darker accents for the eye and nostril.
Which view is easiest to begin with?
A clean side view lets you study the long face without solving a front-view muzzle or two-eye symmetry at the same time.
Do I have to draw every hair?
No. Start with broad locks and add only a few strands that explain the flow.
Try a second sketch
Repeat this easy horse head pencil drawing tutorial with fewer mane lines. Keep the side-profile line art clear and compare the two silhouettes. If one feature still looks wrong, correct its placement before adding shadow.