PENCIL PRACTICE · BEGINNER GUIDE
Background drawing tutorial: an easy landscape in 6 steps
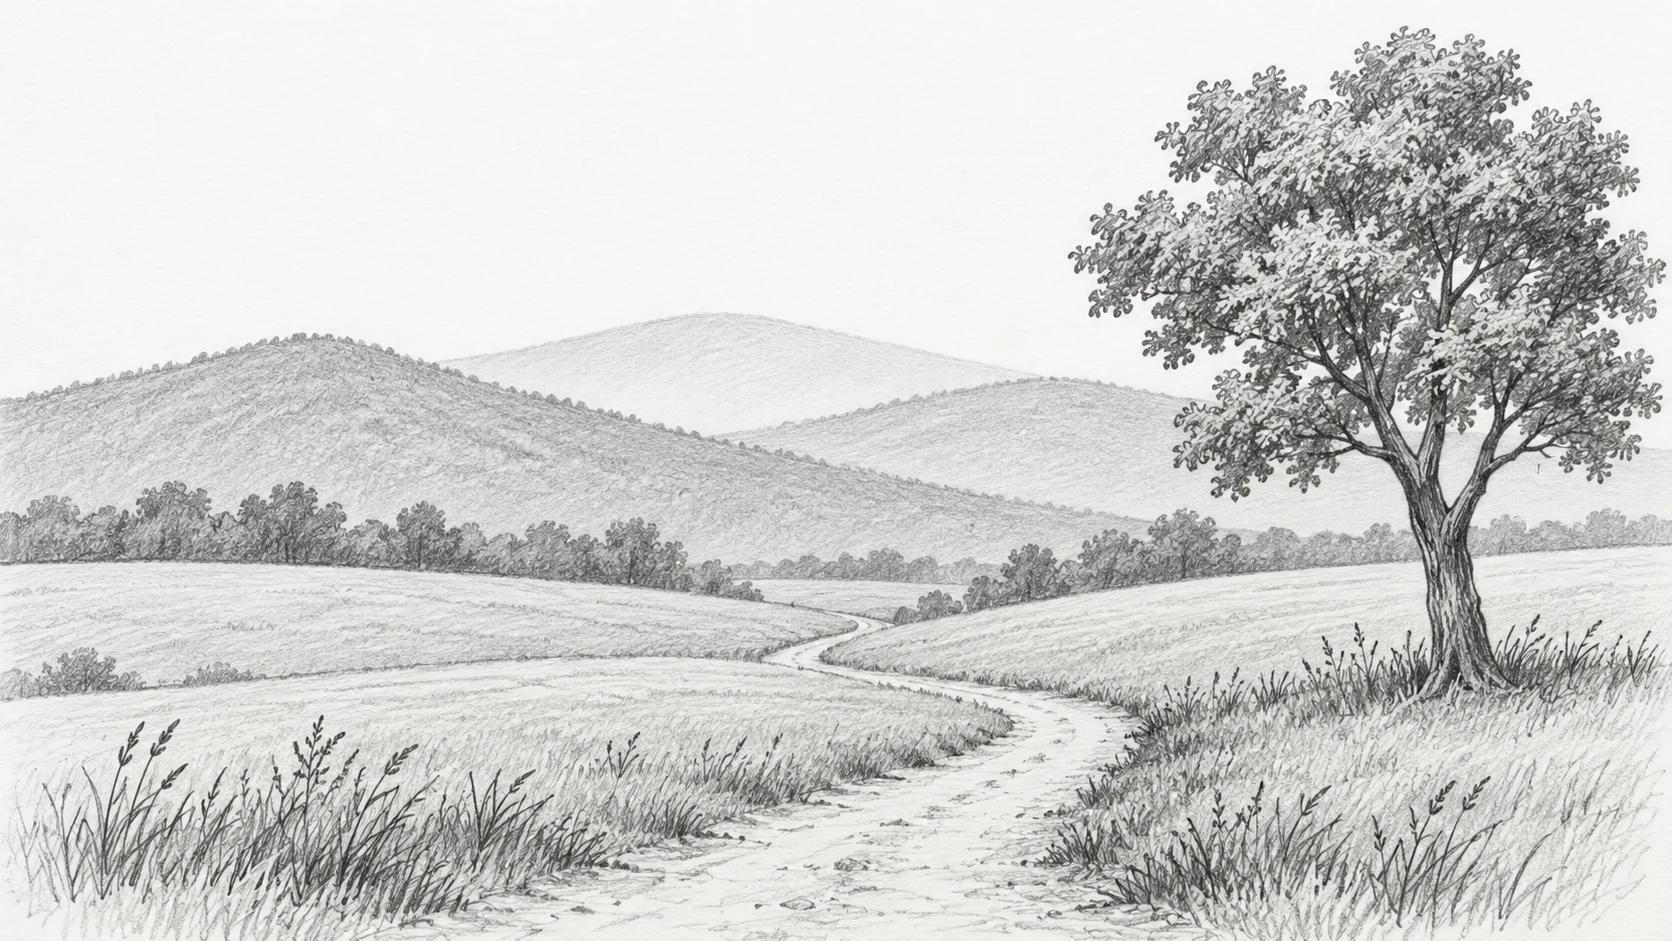
This background drawing tutorial builds a small landscape around a winding path. You will place three bands of space, use overlaps to show which shapes sit in front, and reserve the strongest marks for a nearby tree. Start with a small thumbnail so you can change the arrangement easily. The finished reference is more detailed than your first sketch needs to be.
What you need and how to begin
Use drawing paper, an HB pencil and an eraser. A softer pencil is optional for the foreground. Draw a small horizontal frame before starting; keep your first lines light enough to remove. A ruler is useful for the frame but unnecessary for the hills.
Decide where the viewer is standing and which subject should attract attention. In this exercise the tree sits to the right, with open space around the path. Keep that arrangement through the sketch rather than filling each empty patch with a new object.
Background drawing tutorial — step by step
STEP 1 / 6
Set the horizon

Black: earlier lines. Red: this step. Gray: temporary construction guides. Lightly draw a horizontal eye-level guide above the middle of the frame. Leave a broad area below it for the path and nearby grass. The guide helps you organise space; most of it can disappear behind the hills later. Avoid a heavy line through the entire finished scene.
Check your drawing: Check that the frame has room for both the sky and the foreground.
STEP 2 / 6
Separate three planes

Black: earlier lines. Red: this step. Gray: temporary construction guides. Sketch a distant ridge, a lower middle-ground hill and a curved foreground edge. Let one contour stop where another passes in front of it. Vary the height of the ridges so the scene does not become three parallel stripes. For now, use outlines without shading.
Check your drawing: Every overlap should have a clear front edge and a hidden back edge.
STEP 3 / 6
Lead a path into the distance
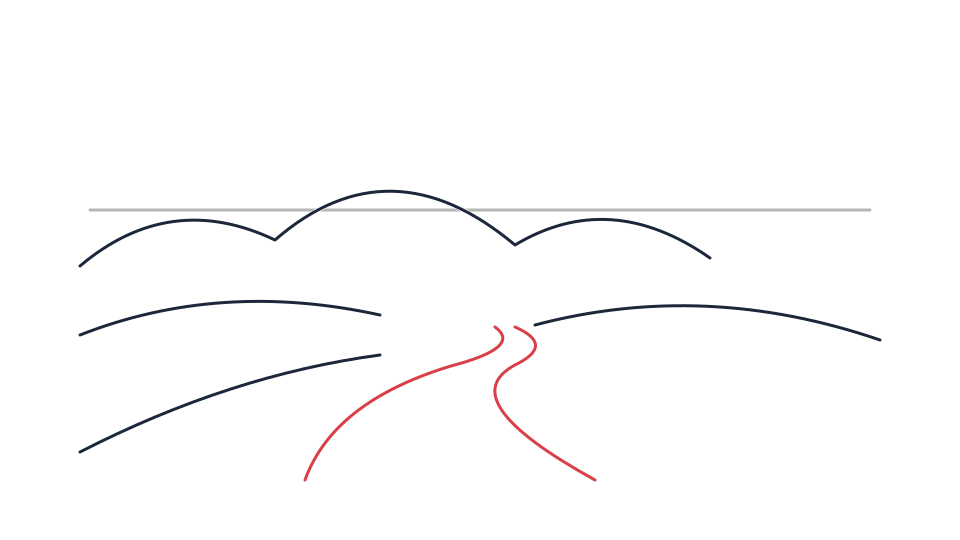
Black: earlier lines. Red: this step. Gray: temporary construction guides. Draw two curves from the bottom toward a small gap between the hills. Keep them far apart near the viewer and bring them closer together farther away. Let the path bend behind a hill instead of ending at an unexplained point in the middle of the field.
Check your drawing: Cover the tree area: the path should already give a sense of depth.
STEP 4 / 6
Place the foreground tree
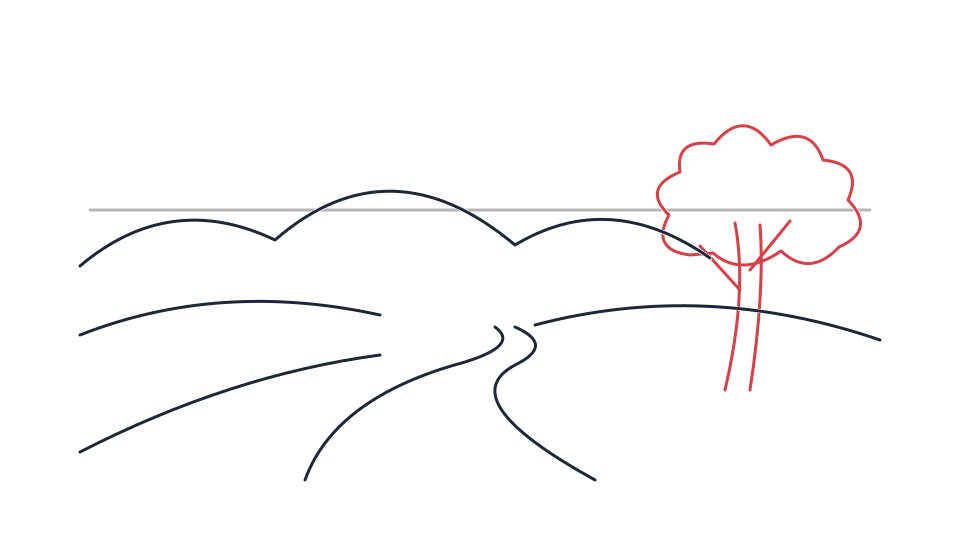
Black: earlier lines. Red: this step. Gray: temporary construction guides. Add a trunk on the right and block the crown as a few connected masses. Allow the tree to overlap the hill behind it. Split the trunk into a small number of branches, thinning them toward their tips. Keep the path entrance visible; a tree in the foreground need not block the whole scene.
Check your drawing: The trunk should meet the ground instead of floating above the grass.
STEP 5 / 6
Control detail and value
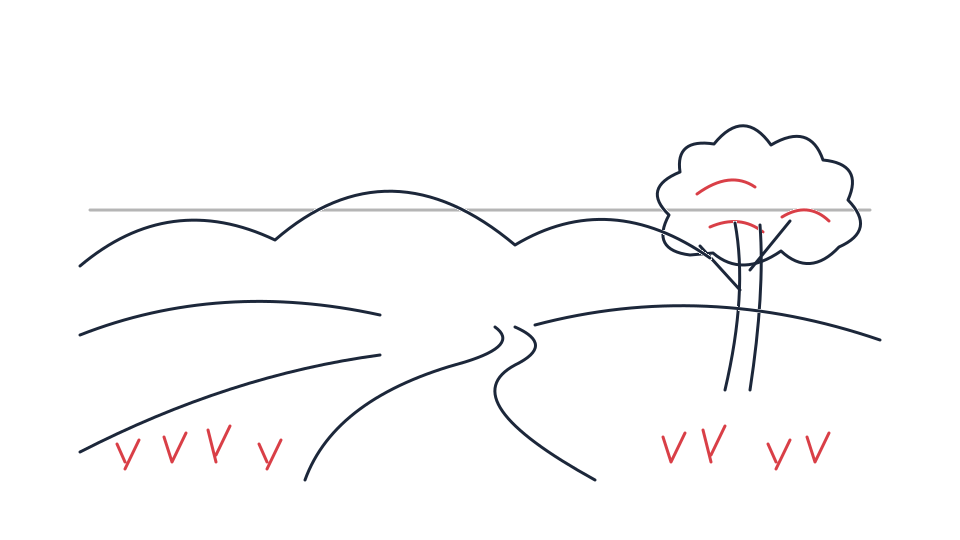
Black: earlier lines. Red: this step. Gray: temporary construction guides. Keep the distant hills pale and soften their smaller edges. Add short grass marks and a few darker branch lines near the viewer. Use three broad value groups rather than shading every object separately. This is a useful depth cue for this landscape, not a rule that every background must be pale.
Check your drawing: Squint at the page and check that the near tree separates from the hills.
STEP 6 / 6
Remove competing marks
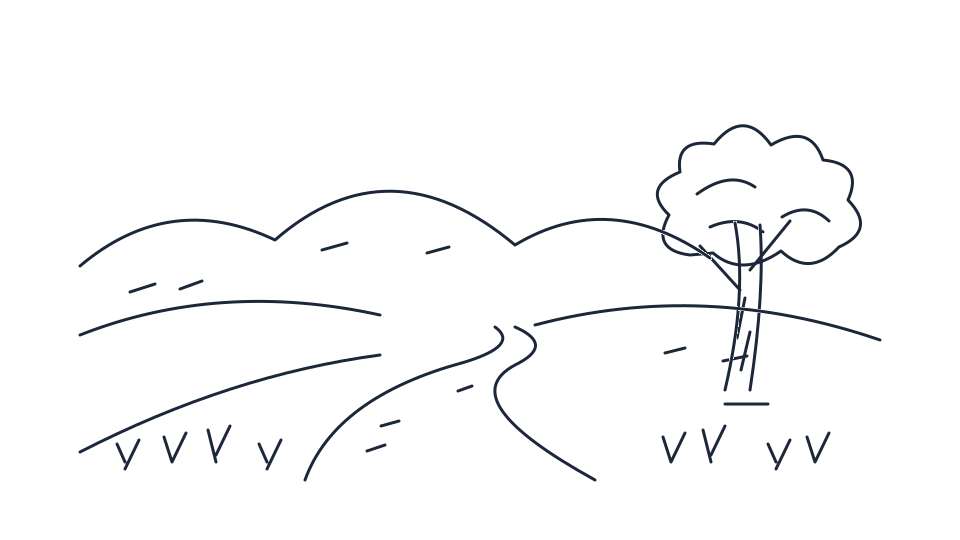
Finished practice line drawing; construction guides are removed. Erase construction lines that cross visible objects. Darken only a few important edges on the tree and the near path. Leave some grass and distant slopes unfinished. Compare your thumbnail with the reference, then stop before extra texture hides the large shapes you established at the start.
Check your drawing: Your eye should find the path before it gets caught in scattered dark dots.
Common problems and small corrections
The scene looks flat
Check overlaps and the narrowing path before adding shading. A dark sky cannot repair a path whose two sides stay equally far apart.
Every area has the same texture
Erase some distant grass and foliage marks. Keep a few larger foreground strokes so the viewer can compare the two distances.
Questions about this drawing exercise
Do I need a ruler for a background?
No. A ruler can establish an eye-level guide, but organic hills, trees and paths can be drawn freehand.
Can I add a character later?
Yes. Leave a clear area for the figure and check its feet against the ground plane. Keep busy branches away from the face.
Should I shade the sky?
You can leave it white. In a small pencil study, a few clouds or a clean white sky may make the foreground easier to read.
Try a second sketch
Repeat the background drawing tutorial as a second thumbnail with the tree on the other side. Keep the same three depth planes and compare how the path guides your eye. Choose the clearer arrangement before making a larger drawing.