PENCIL PRACTICE · BEGINNER GUIDE
Compass rose drawing tutorial: an eight-point design in 6 steps
A compass rose is a directional diagram, rather than a flower. This compass rose drawing tutorial makes an eight-point version: four longer points for north, east, south and west, with shorter points between them. The exercise is useful for practising symmetry and controlled straight lines. You can leave it as line art or shade half of each point for a folded appearance.
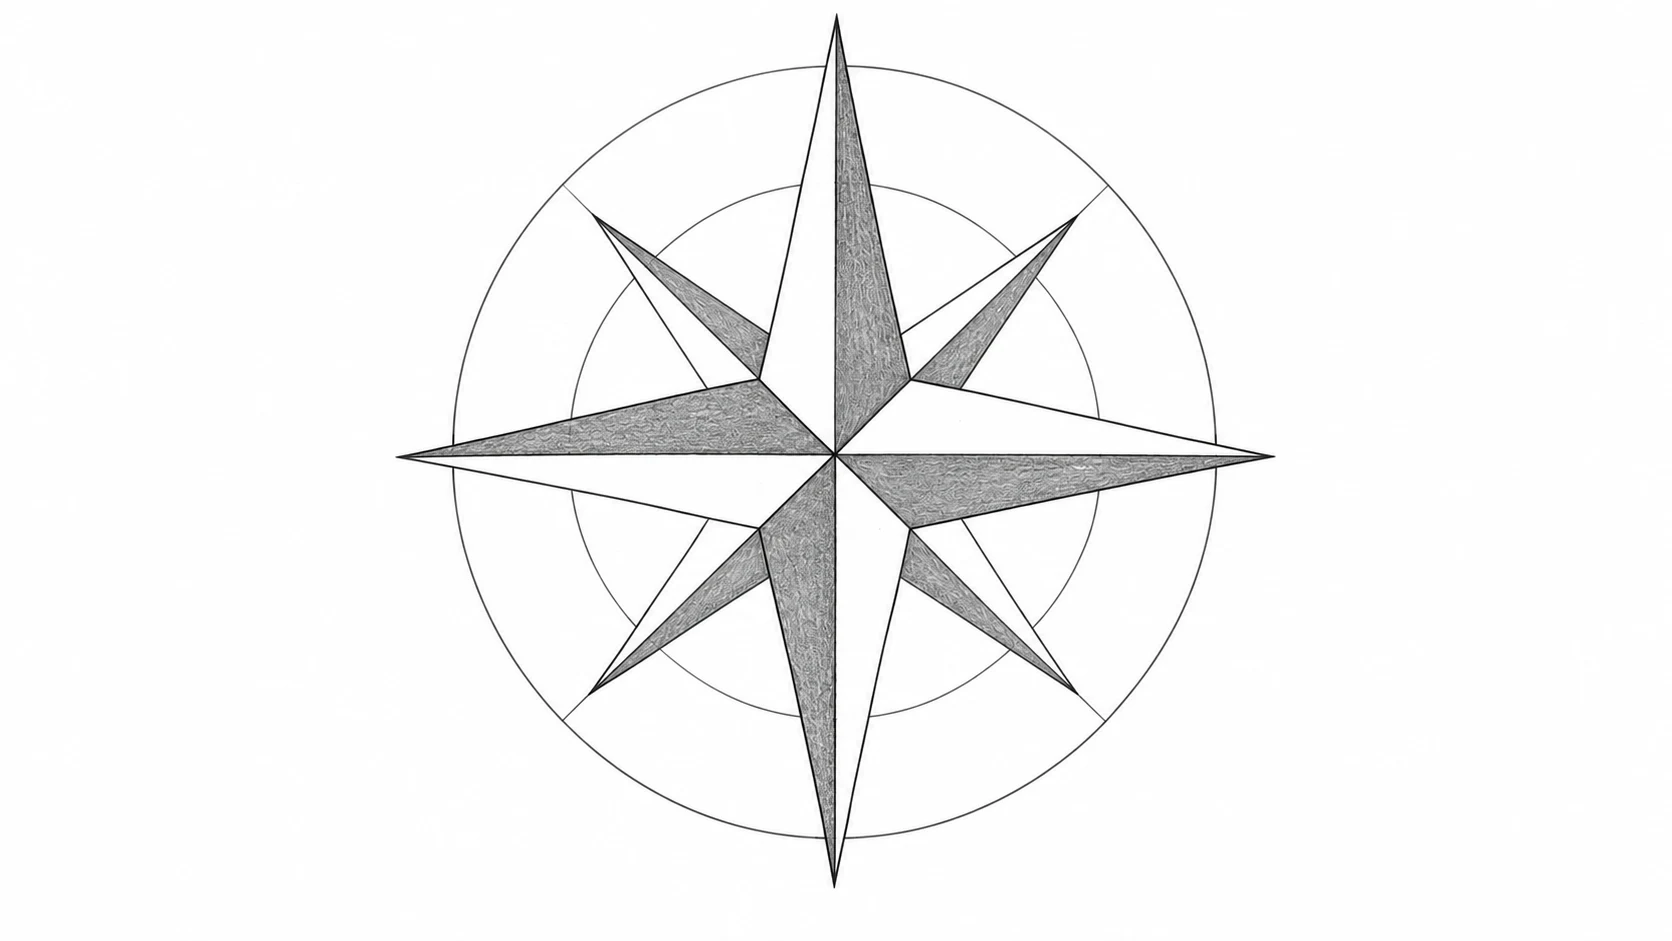
What you need and how to begin
Prepare an HB pencil, eraser, ruler and a compass or circular object to trace. A protractor is optional for marking equal diagonal directions. Keep the circular guides faint; the final design is made of straight edges.
Place the centre well away from the paper edges. Plan enough room outside the outer circle for optional direction letters. The spacing in this exercise is a drawing choice; the finished illustration is decorative and is not a navigation instrument.
Compass rose drawing tutorial — step by step
STEP 1 / 6
Draw two concentric guides
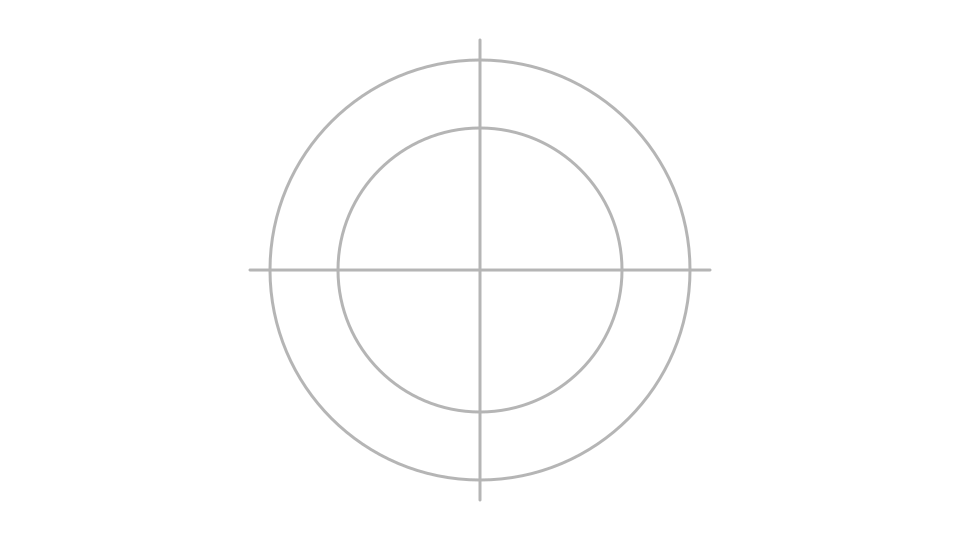
Black: earlier lines. Red: this step. Gray: temporary construction guides. Mark one centre point. Draw a large circle for the long point tips and a smaller concentric circle for the short point tips. Make the smaller circle visibly smaller so the two point lengths will be easy to distinguish. Do not press deeply into the paper.
Check your drawing: Both circles should share exactly the same centre.
STEP 2 / 6
Mark the cardinal axes
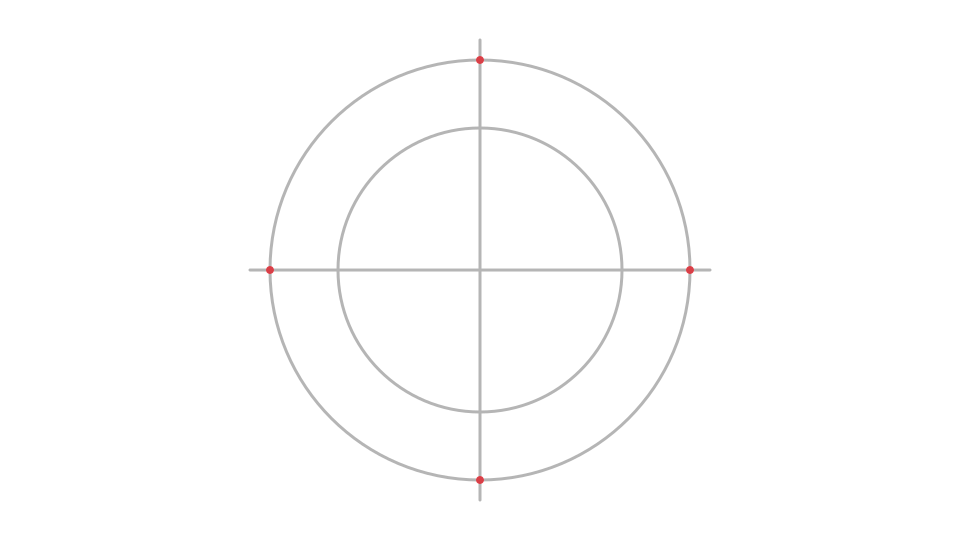
Black: earlier lines. Red: this step. Gray: temporary construction guides. Draw a vertical diameter and a horizontal diameter through the centre. Mark the four intersections with the outer circle. These are the tips of the main points. If you want north at the top, keep the vertical axis aligned with the paper edge.
Check your drawing: The horizontal and vertical axes should meet at a right angle.
STEP 3 / 6
Locate the diagonal tips
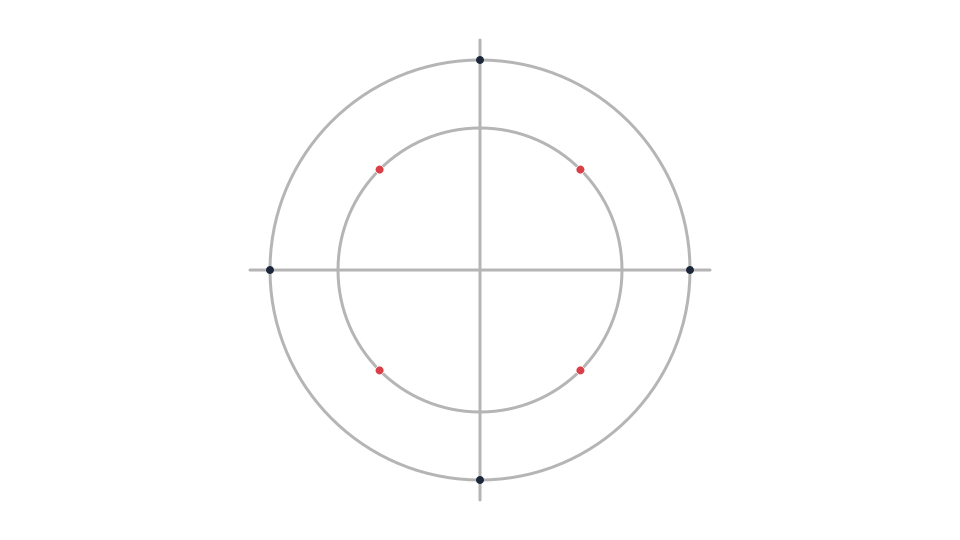
Black: earlier lines. Red: this step. Gray: temporary construction guides. Bisect each quadrant with a light diagonal line. Mark its intersection with the smaller circle, not the outer circle. You now have eight directions but two lengths of tips. Work around the centre in order so none of the diagonal points is accidentally placed in the wrong quadrant.
Check your drawing: Four tips should be long and four should be shorter, alternating around the circle.
STEP 4 / 6
Build narrow triangular points
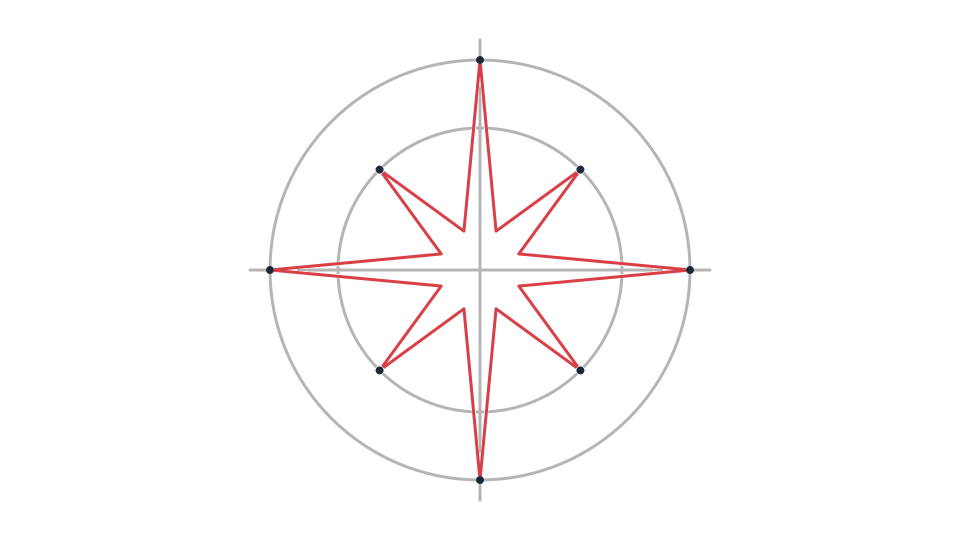
Black: earlier lines. Red: this step. Gray: temporary construction guides. Mark eight evenly spaced valleys on a very small circle near the centre, halfway between adjacent tip directions. Connect each tip to the two valleys beside it. Use one consistent valley radius so the outer outline forms a balanced star without irregular gaps between its arms.
Check your drawing: Trace the outside with your finger: the outline should close without crossing itself.
STEP 5 / 6
Divide and shade the facets
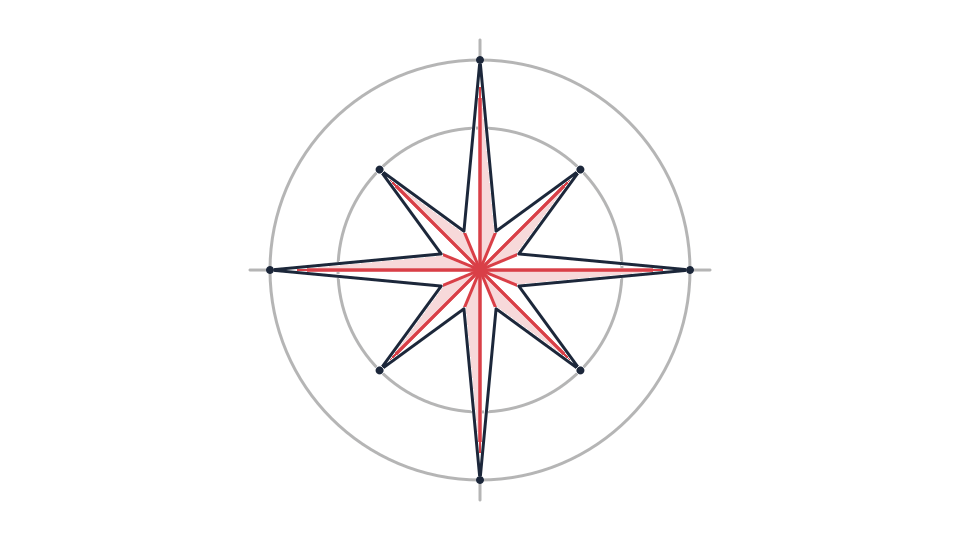
Black: earlier lines. Red: this step. Gray: temporary construction guides. Connect every tip and valley to the centre. Each point now has two triangular halves. Shade the clockwise half of every point lightly and leave the other half white. Rotate the paper as needed so you can make clean strokes inside the narrow triangles.
Check your drawing: Keep the same shaded side as you move around all eight points.
STEP 6 / 6
Erase guides and add optional labels
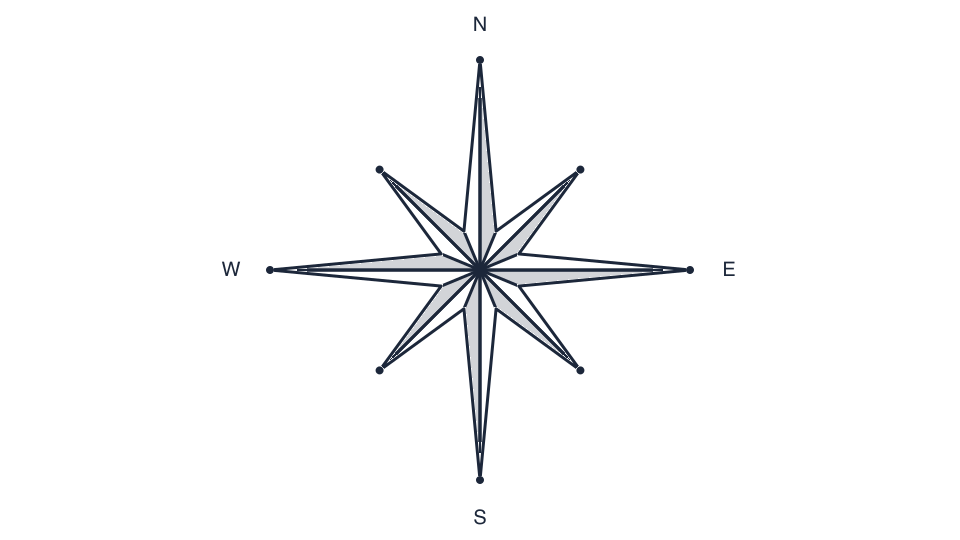
Finished practice line drawing; construction guides are removed. Remove the circular guides and any axes outside the star. Sharpen the eight tip connections with short controlled strokes. If adding English direction labels, place N above, E to the right, S below and W to the left. Keep letters outside the star so they do not crowd the point tips.
Check your drawing: Check east and west from the viewer’s position before finishing the labels.
Common problems and small corrections
One arm looks wider
Compare the two valleys beside it. Moving a valley is often a better correction than shortening a correctly placed tip.
The shading turns into a pinwheel
Choose one point as the model and check the clockwise half on each following point. Do not shade every left-facing triangle by eye.
Questions about this drawing exercise
Can I make a four-point compass rose?
Yes. Omit the diagonal tips and space the valleys between the four cardinal tips. Keep one shared centre.
Do the short points need to touch the same circle?
For this symmetrical design, yes. A shared guide makes equal lengths easier to check.
Can I ink the design?
Yes. Check symmetry in pencil first, trace the selected edges, let the ink dry and erase the guides gently.
Try a second sketch
Try the compass rose drawing tutorial again using only four points. Compare the negative spaces before returning to eight points. Keep your cleanest version as a map decoration or a straight-line practice sheet.