PENCIL PRACTICE · BEGINNER GUIDE
Beach drawing tutorial: a shoreline, waves and umbrella in 6 steps
This beach drawing tutorial uses a curved shoreline to separate quiet sand from the water. The horizon stays straight while the near wave edges curve with the beach. A small umbrella gives the scene a focal point without filling the sand with objects. You can finish the exercise in pencil; colour and detailed foam are optional additions after the main spaces feel clear.
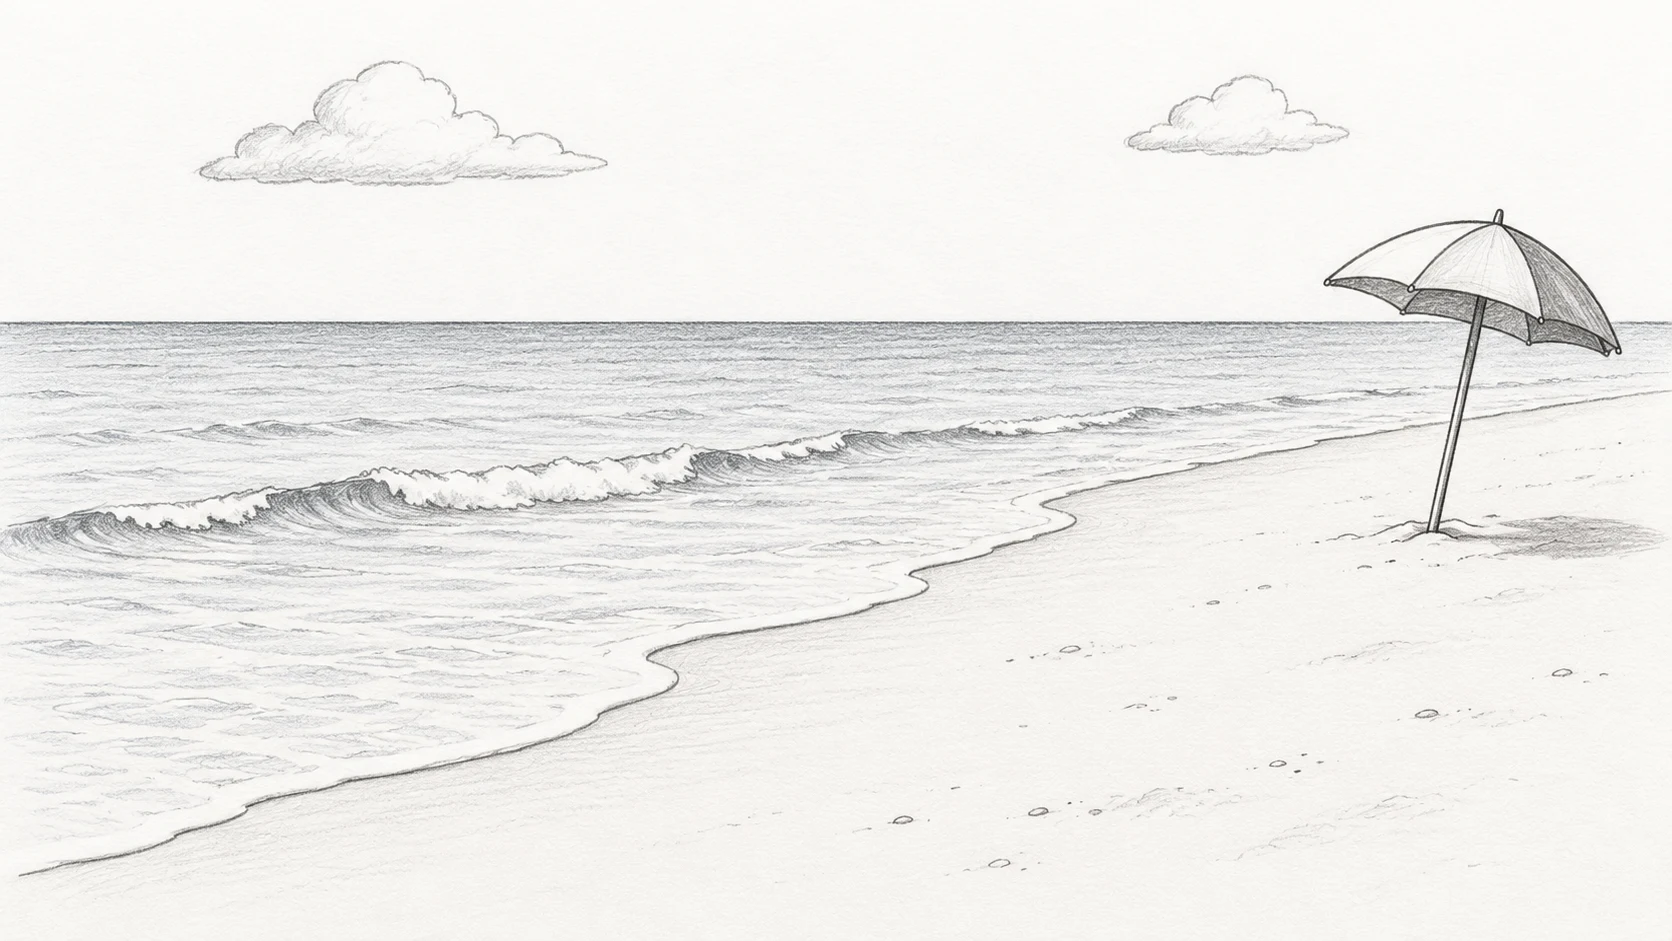
What you need and how to begin
Prepare paper, an HB pencil, an eraser and a ruler for the horizon if needed. Keep a clean scrap sheet under your drawing hand to avoid smearing the pale sky. Use light pressure for the water marks so you can lift them later.
Choose a wide frame. Reserve the upper area for the sky and keep an open foreground for the sand. Place the umbrella on the dry side of the shore, leaving space between its pole and the nearest wave edge.
Beach drawing tutorial — step by step
STEP 1 / 6
Keep the horizon level

Black: earlier lines. Red: this step. Gray: temporary construction guides. Place a faint straight horizon above the middle of the page. Check it against the paper edge before continuing. Leave it uninterrupted where the distant sea meets the sky. A small tilt is very noticeable in an otherwise calm ocean scene, so correct it while the line is still light.
Check your drawing: Do not use a wave-shaped line for the distant horizon.
STEP 2 / 6
Sweep the shoreline across the sand
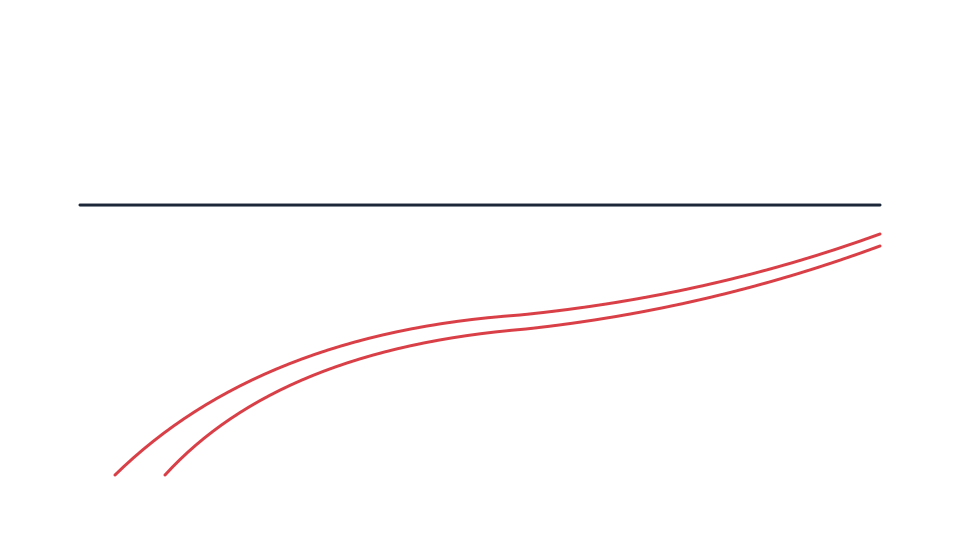
Black: earlier lines. Red: this step. Gray: temporary construction guides. Draw a broad curve from the lower left toward the far right, keeping the water on one side and the sand on the other. Add a second, lighter curve close to it for a thin band of wet sand. Let both narrow as they move into the distance.
Check your drawing: Follow each curve from foreground to distance without an unexplained break.
STEP 3 / 6
Add a few shallow waves
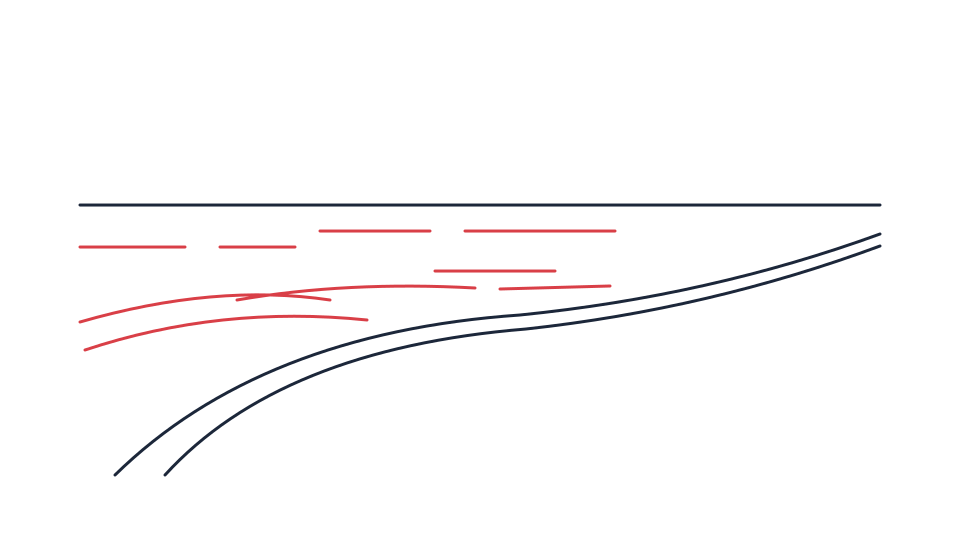
Black: earlier lines. Red: this step. Gray: temporary construction guides. Place short, mostly horizontal marks on the distant water. Near the shore, use longer curved edges that follow the beach. Leave white gaps for foam rather than outlining every bubble. Space the marks more tightly near the horizon and farther apart in the foreground.
Check your drawing: The wave marks should sit below the horizon, inside the water area.
STEP 4 / 6
Set an umbrella on dry sand
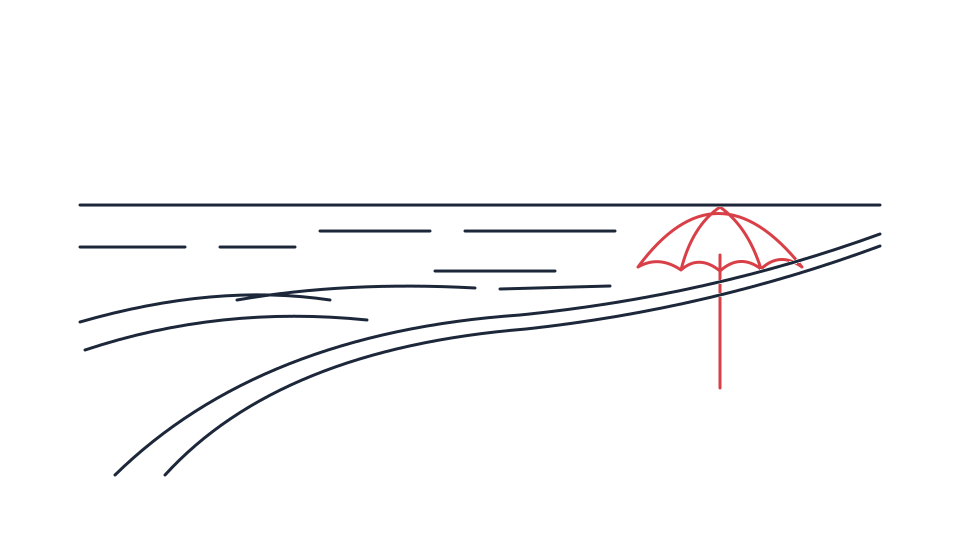
Black: earlier lines. Red: this step. Gray: temporary construction guides. Draw a slim pole on the sand to the right. Place a shallow dome above it and divide the canopy with a few curved panel lines. Add a small lower edge beneath the dome. Keep the pole visible below the canopy so its ground contact remains clear.
Check your drawing: The pole should meet the sand before reaching the water.
STEP 5 / 6
Suggest sand and one shadow
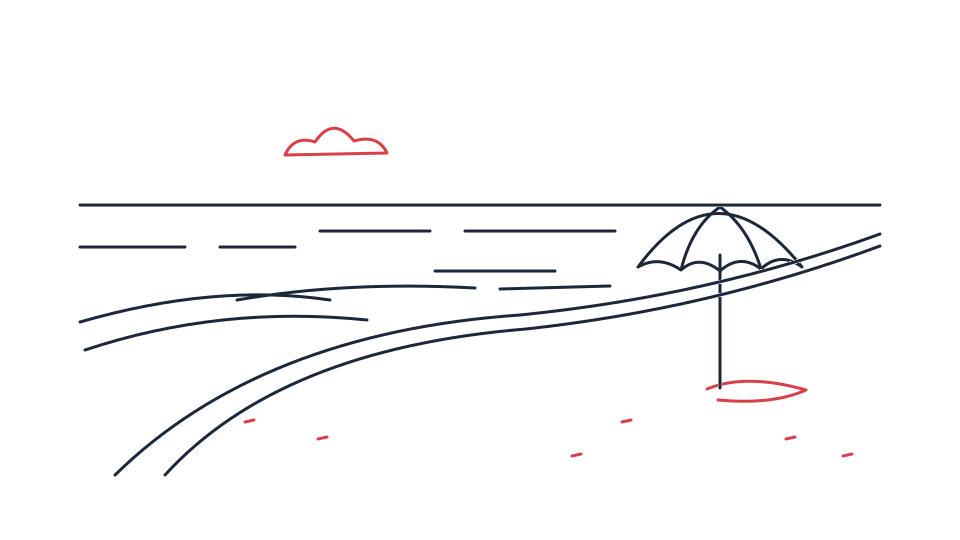
Black: earlier lines. Red: this step. Gray: temporary construction guides. Use a few small broken marks near the viewer for sand texture. Add a soft shadow beside the umbrella, choosing one light direction. Leave the distant sand quiet. If you add clouds, keep them pale and away from the horizon so they do not look like another row of waves.
Check your drawing: The shadow should be connected to the umbrella’s ground contact.
STEP 6 / 6
Clean the open spaces
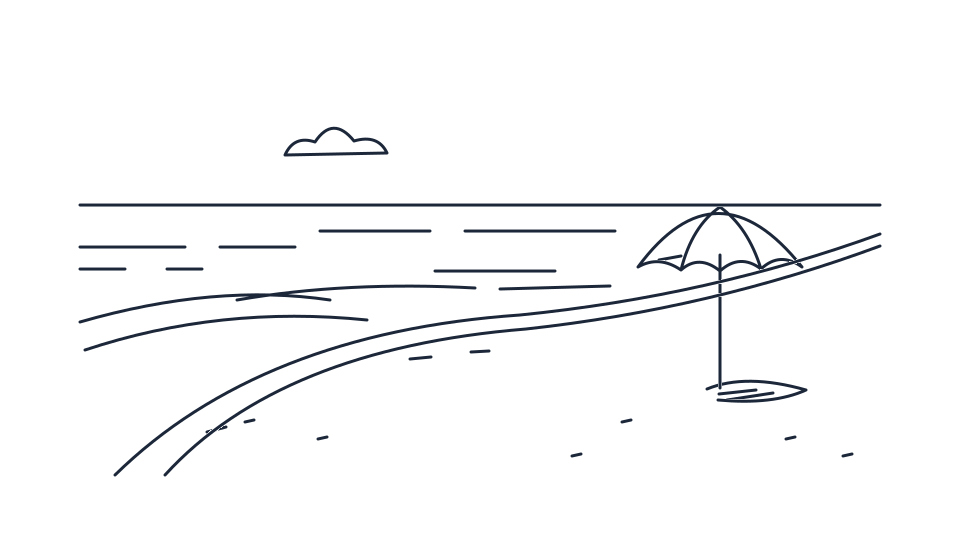
Finished practice line drawing; construction guides are removed. Lift stray graphite from the sky and foam with the eraser. Strengthen only the nearest shoreline and a few umbrella edges. Compare the amount of detail in sea and sand; if both are equally busy, remove some marks. The empty areas are part of the beach composition.
Check your drawing: The eye should be able to rest on broad areas of sand and sky.
Common problems and small corrections
The ocean looks like a wall
Reduce the vertical marks and shorten the distant wave strokes. Recheck the level horizon before adding more shading.
The shoreline looks like a thick rope
Erase parts of the doubled outline. Use a soft wet-sand value change rather than two equally dark parallel lines.
Questions about this drawing exercise
Can I skip the umbrella?
Yes. Keep the shoreline and a few wave marks as the whole exercise, or use a single small shell as a foreground subject.
How do I make foam look white?
Reserve the paper and shade a little around it. Outlining every foam shape in black can make it look heavy.
Do I need blue pencils?
No. Shape, spacing and value can describe a beach in ordinary graphite. Add colour after the structure is clear if you want it.
Try a second sketch
Repeat the beach drawing tutorial with a lower horizon and more sky. Keep the shoreline broad and the distant water marks short. Compare which version gives the umbrella enough space without losing the sense of a wide coast.