PENCIL PRACTICE · BEGINNER GUIDE
Ripped jeans drawing tutorial: folds, tears and denim in 6 steps
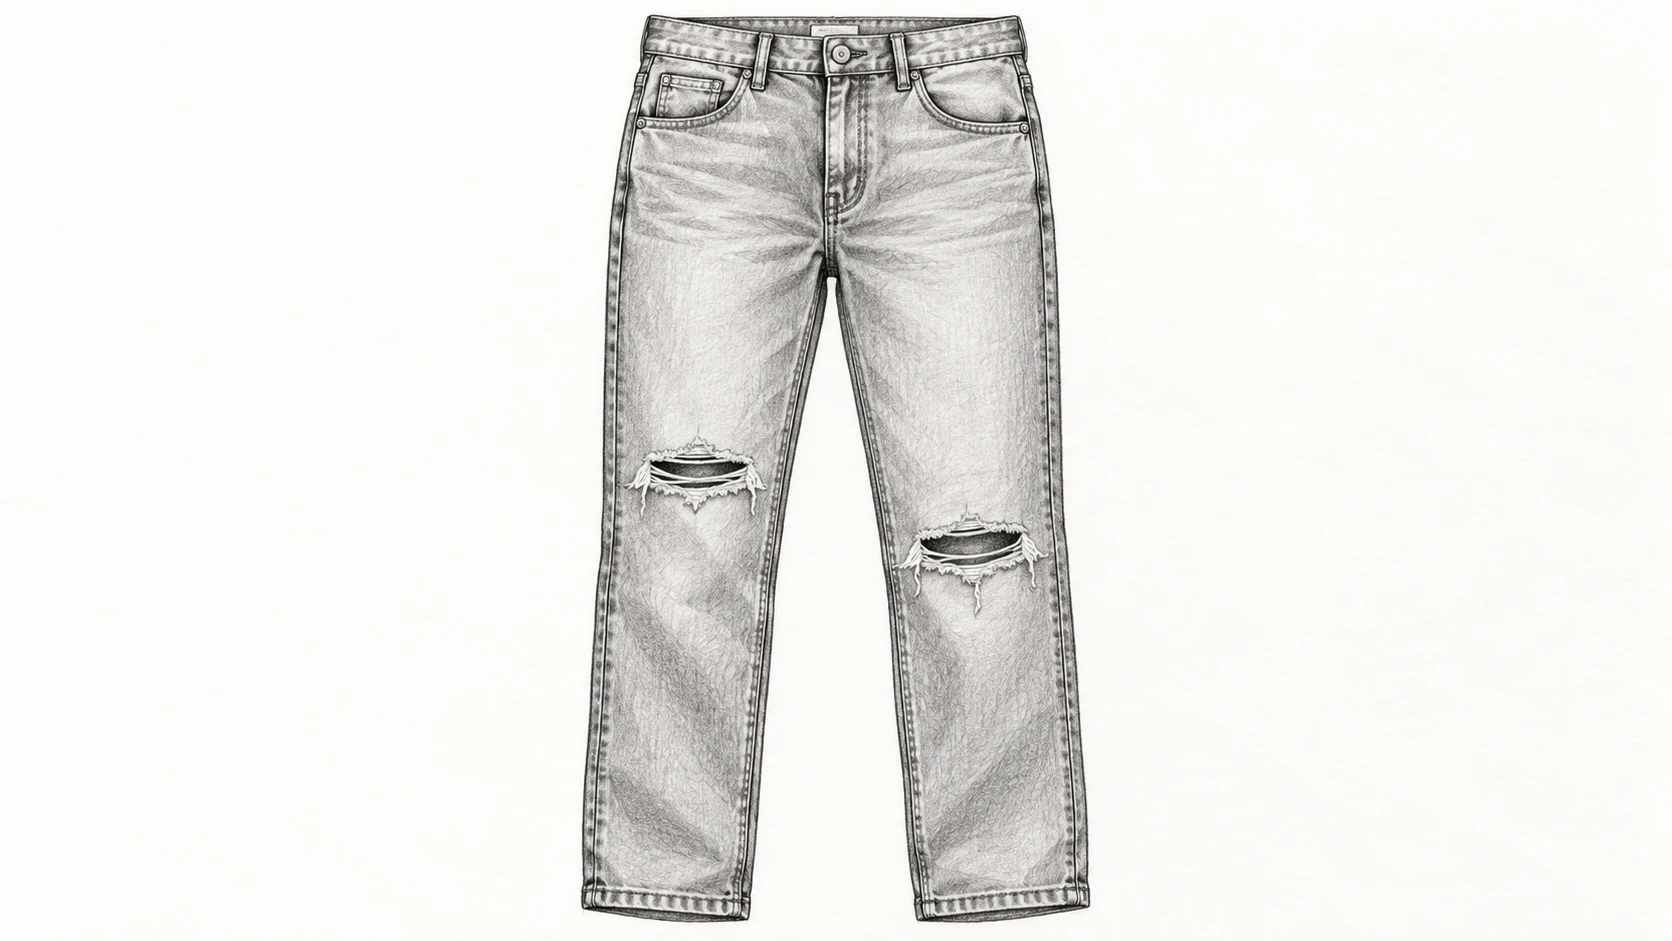
This ripped jeans drawing tutorial starts with a flat front view so you can study the clothing without also solving a figure pose. Draw the waistband and leg silhouette before adding any tears. The holes should sit on the fabric surface, with frayed edges and a few stretched threads. They do not need thick black outlines or dozens of tiny marks to read clearly.
What you need and how to begin
Use an HB pencil and eraser. A softer pencil can darken the recessed area behind a tear. Keep the page tall enough for the whole garment. If using a reference photo, choose one pair of jeans with a visible waistband and both hems.
Decide whether you are drawing loose straight-leg jeans or a narrow fit. This exercise uses straight legs and two modest knee tears. Keep that choice consistent: a flat pair of trousers does not need the same folds as jeans stretched over a bent knee.
Ripped jeans drawing tutorial — step by step
STEP 1 / 6
Block the waist and full length
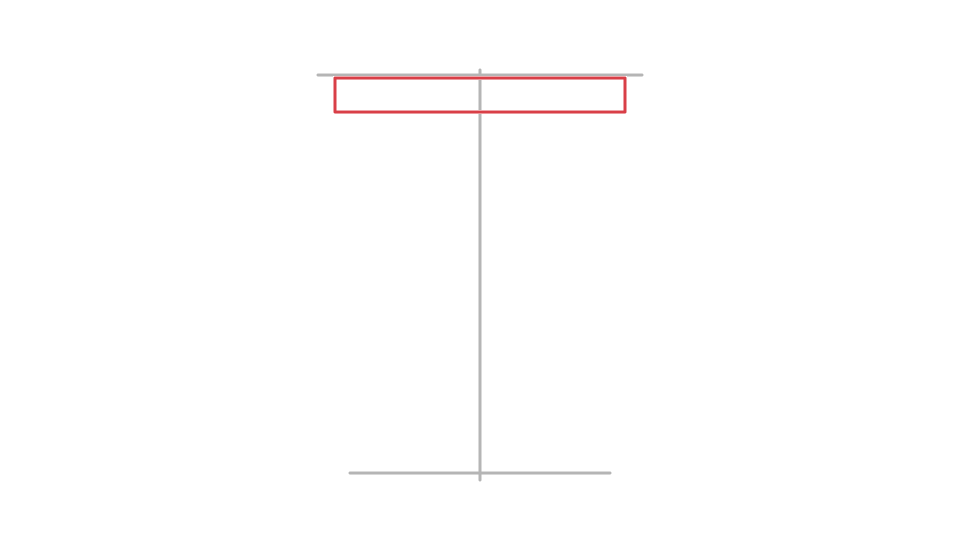
Black: earlier lines. Red: this step. Gray: temporary construction guides. Draw a shallow horizontal waistband and a light centre guide below it. Mark the crotch level and the two hem positions before connecting any contours. Compare the overall width with the length so the jeans do not grow shorter as you add pockets and seams.
Check your drawing: Both hems should fit comfortably inside the page.
STEP 2 / 6
Shape the two legs
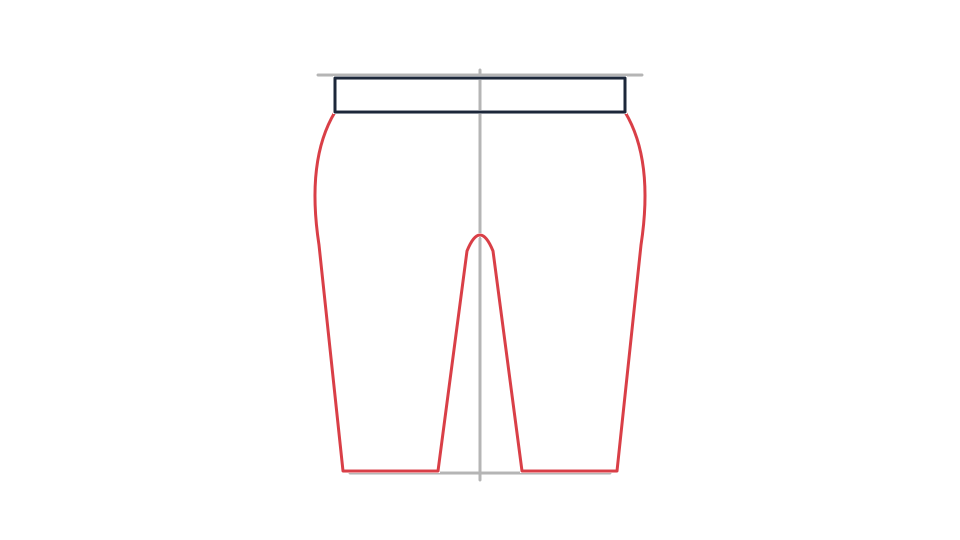
Black: earlier lines. Red: this step. Gray: temporary construction guides. From the waistband, curve slightly over the hips and continue down the outer legs. Split the inner contour at the crotch and lead it toward the hems. Leave a narrow gap between the legs. Keep the two legs similar in length without making every contour perfectly mirrored.
Check your drawing: Check the crotch connection before drawing the fly.
STEP 3 / 6
Add the waistband, fly and pockets
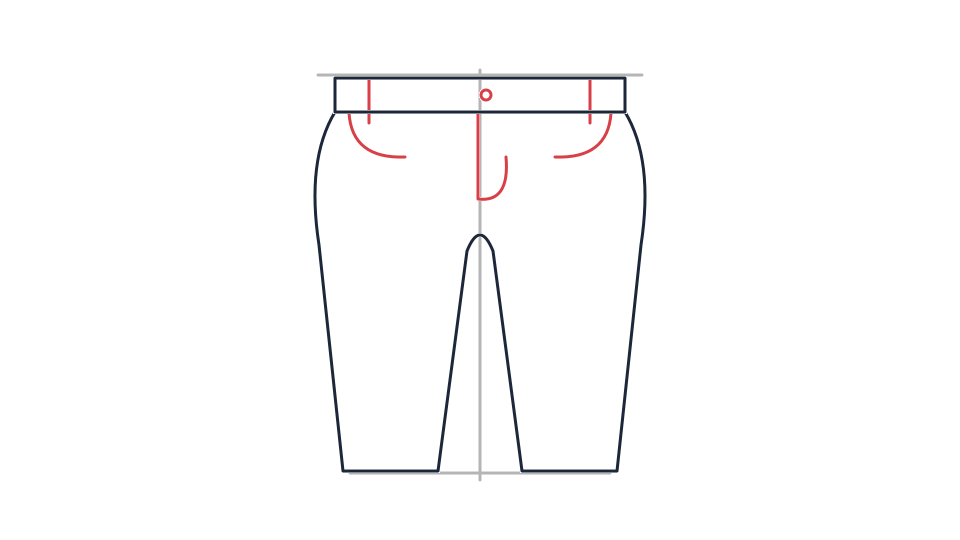
Black: earlier lines. Red: this step. Gray: temporary construction guides. Give the waistband a little thickness and add one button near the centre. Draw a short fly seam below it. Place two curved pocket openings at similar heights, then add only a few belt loops. These features should sit inside the clothing silhouette rather than pushing its edges outward.
Check your drawing: The fly should align with the waistband centre.
STEP 4 / 6
Place tears across the knees
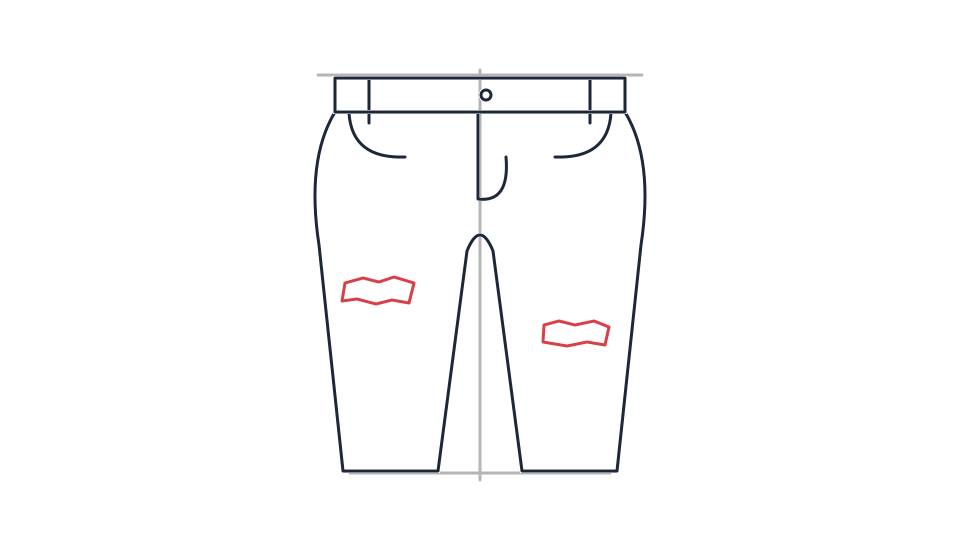
Black: earlier lines. Red: this step. Gray: temporary construction guides. Mark two short irregular openings across the leg surfaces at slightly different heights. Keep each tear well inside the side seams. A tear can be shallow and narrow; do not cut the entire leg in two. Let the lower edge dip a little to suggest a loose fabric flap.
Check your drawing: Each opening should still be surrounded by intact cloth.
STEP 5 / 6
Suggest fraying and denim folds
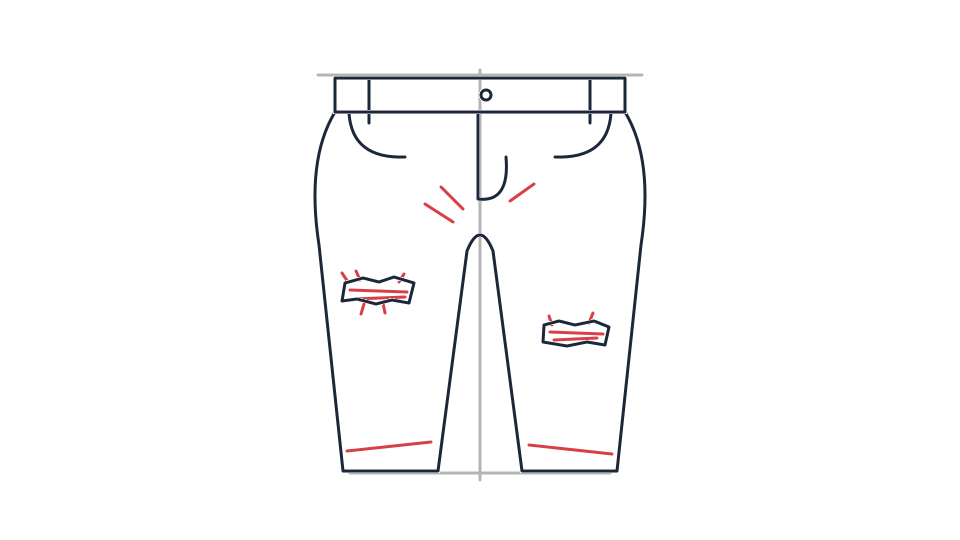
Black: earlier lines. Red: this step. Gray: temporary construction guides. Add a few thin horizontal threads across each tear, leaving irregular gaps. Use short broken strokes along the torn edge. Place small angled folds near the crotch and softer compressions near the hems. Avoid repeating identical zigzags down the entire leg; folds need a reason to change direction.
Check your drawing: Threads should look finer than the outer side seams.
STEP 6 / 6
Separate the hole from the fabric
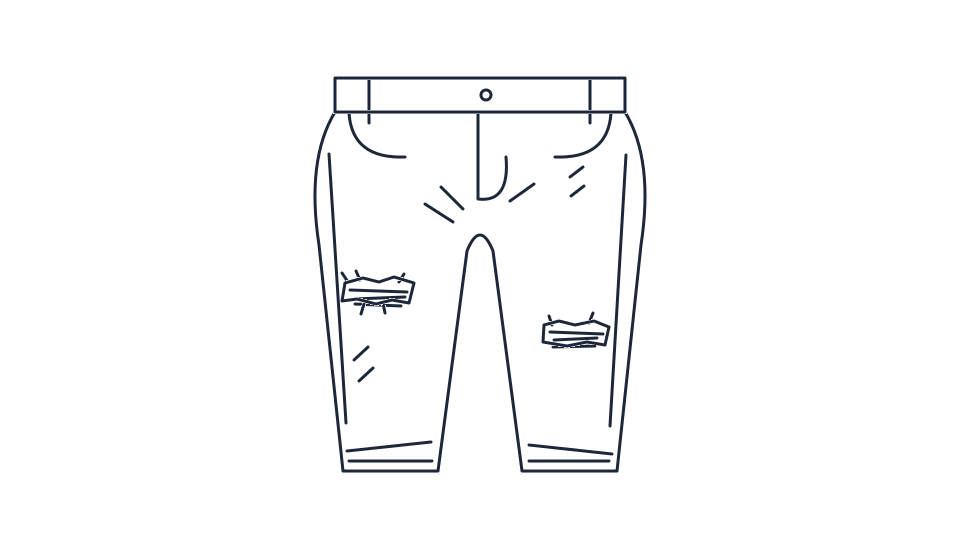
Finished practice line drawing; construction guides are removed. Shade the recess behind the loose threads, then use light diagonal hatching on a few fabric areas. Leave highlights and broad quiet spaces on the legs. Erase centre guides and any contour that crosses an open tear. Stop when the openings, seams and silhouette are clearly different marks.
Check your drawing: The dark recess should not swallow every pale thread.
Common problems and small corrections
The holes look like stickers
Break up the edge and vary its thickness. Keep the interior darker than the surrounding cloth, with a few threads bridging the opening.
The jeans look crumpled everywhere
Remove some mid-leg folds. In this flat view, the silhouette and a few seams can explain most of the garment.
Questions about this drawing exercise
Should I draw skin through the tears?
Not in this flat garment exercise. On a worn pair, skin can show through; follow the figure reference and preserve the leg form underneath.
How many threads do I need?
Only enough to suggest fraying. Start with three or four and add another only if it improves the shape.
Can I draw black jeans?
Yes. Keep the cloth darker but reserve lighter torn edges and enough contrast around the seams. Do not fill the whole garment with one flat value.
Try a second sketch
Repeat the ripped jeans drawing tutorial with just one tear and fewer folds. Compare whether the garment is easier to read. Once the flat version feels clear, try the same design on a simple standing character.