ORIGINAL DRAWING LESSON
Ginger Girl
Today we will draw a red-haired girl with bright green eyes and freckles! Her unusual hair color and expressive facial features will create an amazing image filled with life and energy. Get ready for bright colors and interesting details to convey her unique beauty!
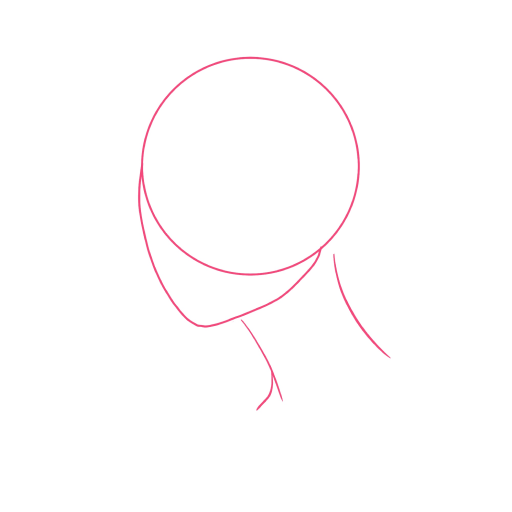
STEP 1 / 12
Step 1
Start with an oval for the head. Add a line for the chin and neck to set the overall tilt of the head. This is the foundation for the face.
Use this image in the tutorial maker →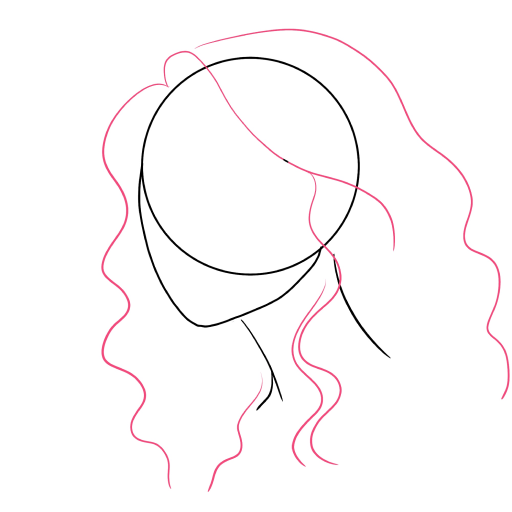
STEP 2 / 12
Step 2
Sketch the hair with large, flowing, and wavy lines. Immediately give it volume and direction to make the hairstyle look full.
Use this image in the tutorial maker →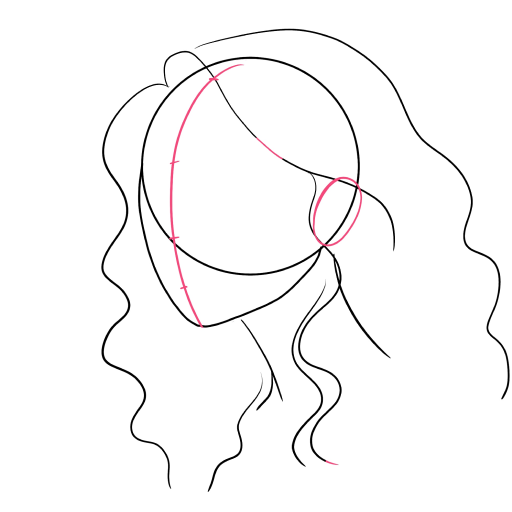
STEP 3 / 12
Step 3
Divide the face into sections with auxiliary lines: a vertical line in the middle and a division into 3 parts. Add an oval for the ear.
Use this image in the tutorial maker →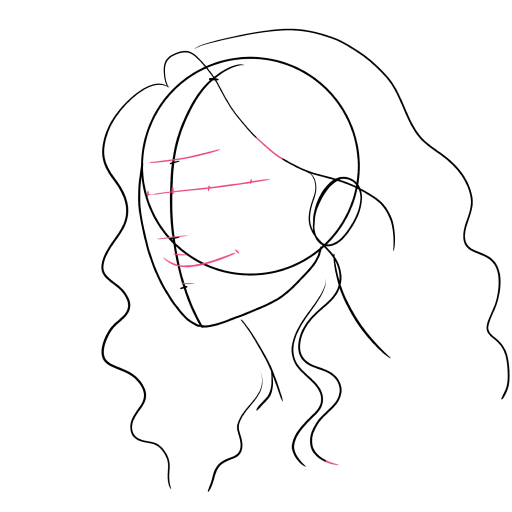
STEP 4 / 12
Step 4
Draw additional horizontal lines—for the eyes, nose, and mouth. They will help you place the facial features correctly.
Use this image in the tutorial maker →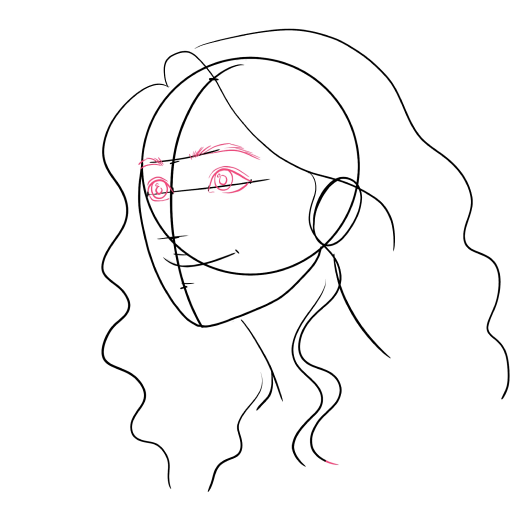
STEP 5 / 12
Step 5
Draw the eyes along the lines. Add eyelids and eyebrows to make the gaze expressive.
Use this image in the tutorial maker →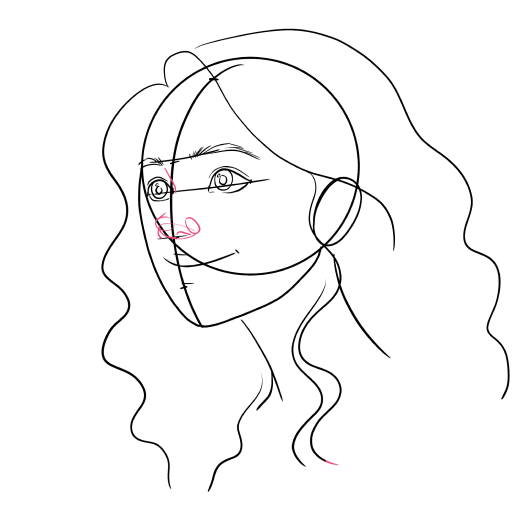
STEP 6 / 12
Step 6
Draw the nose. Use small ovals for the nostrils and lines for the bridge, keeping it light.
Use this image in the tutorial maker →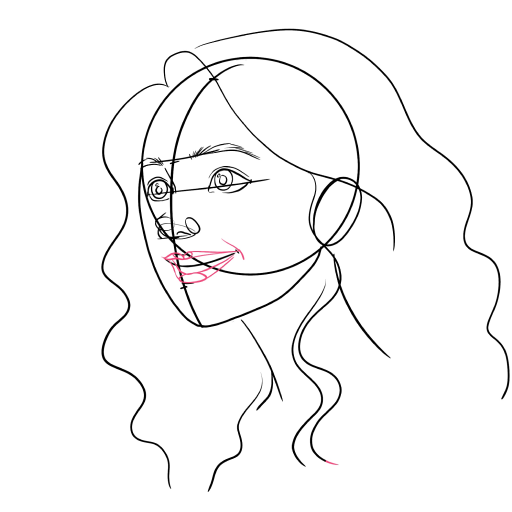
STEP 7 / 12
Step 7
Add the mouth. Slightly raised corners of the lips will create a smile.
Use this image in the tutorial maker →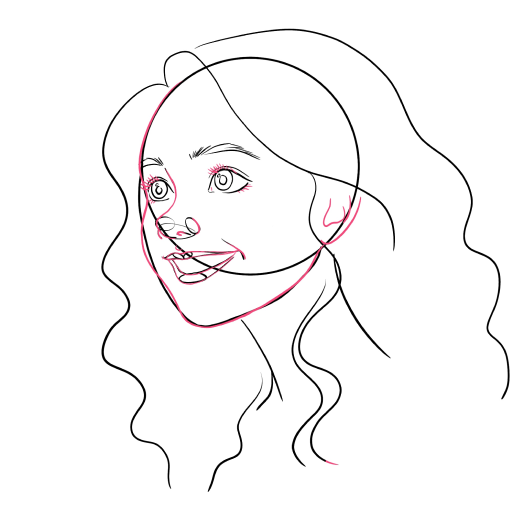
STEP 8 / 12
Step 8
Now outline the main contours of the face with more confident lines. Add the chin, cheek, and a smooth transition to the neck.
Use this image in the tutorial maker →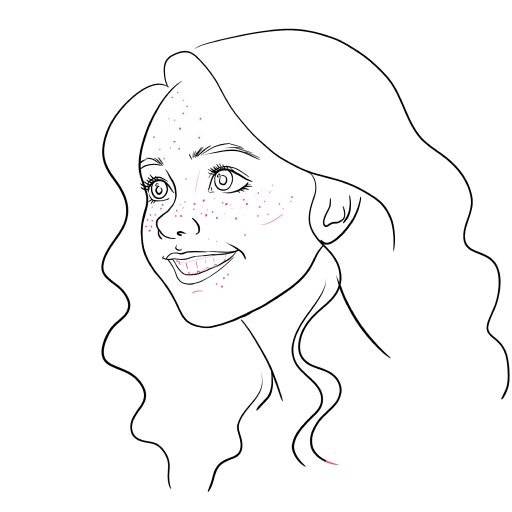
STEP 9 / 12
Step 9
Draw freckles on the face. This will give the image a cute and lively look.
Use this image in the tutorial maker →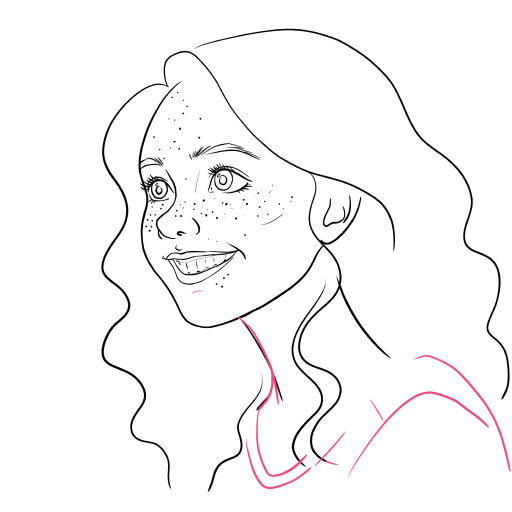
STEP 10 / 12
Step 10
Draw the shoulder and the upper part of the clothes. This completes the figure and makes the portrait finished.
Use this image in the tutorial maker →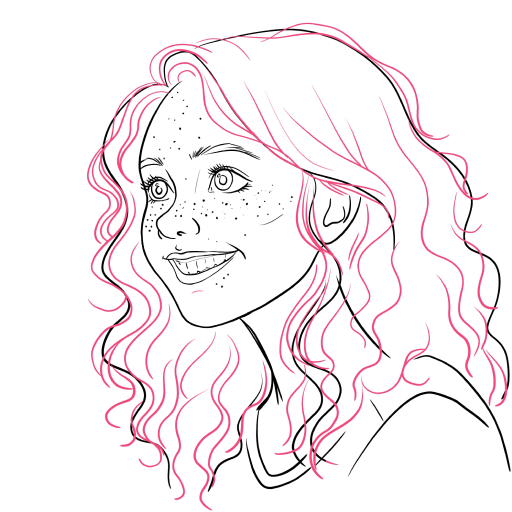
STEP 11 / 12
Step 11
Work on the hair in detail: add individual strands, curls, and texture. Make the lines of different thicknesses to make the hair look natural.
Use this image in the tutorial maker →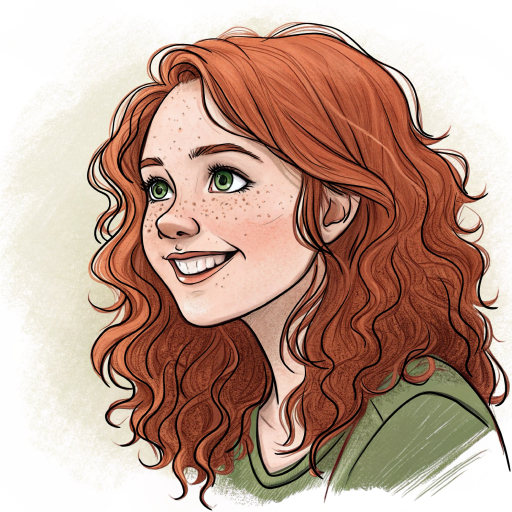
STEP 12 / 12
Step 12
The drawing is ready, color it according to the example.
Use this image in the tutorial maker →


